Introduction to Tokens/it
{{#customtitle:Introduzione ai Tokens|Introduzione ai tokens}}
BEGINNER
THIS IS A BEGINNER ARTICLE
Introduzione ai Tokens di Maptool
Come menzionato nella guida d'Introduzione al Mapping, il token è il gergo per indicare un marcatore visuale posizionato sulla map di MapTool. L'uso più intuitivo per i tokens è rappresentare i personaggi nel gioco - in altre parole, i tokens prendono il posto delle miniature sul tavolo virtuale (virtual tabletop).
Presupposti
Questa guida presume che voi abbiate letto L'Introduzione al Mapping e che voi sappiate come:
- Aggiungere una cartella alla vostra Resource Library ed aggiornare/aggiungere le immagini che la compongono di modo che compaiano in lista
- Creare una map in MapTool
- Depositare tokens sulla map e spostarle
- Cambiare il Name, GM Name e Label dei tokens
- Ridimensionare i token (size)
- Cambiare le immagini dei token
- Traslare un token attraverso i layer (livelli)
Se non sapete come fare queste cose, per piacere leggete la guida di Introduzione al Mapping - altrimenti quello che è scritto di seguito potrebbe risultarvi insensato!
Infine, questa guida è stata scritta principalmente dal punto di vista del GM -- qualcuno che ha il controllo completo su tutte le impostazioni dei token e sulle proprietà della campaign. I Giocatori (cioé gli individui che si uniscono al gioco nel ruolo di "Player") sono limitati su diversi cambiamenti effettuabili in una determinata campaign.
I Layer's di MapTool
Sebbene molti utenti di MapTool si riferiscano ai "token" solamente come le immagini che rappresentano i personaggi e le creature sulla map, in realtà, la parola "token" definisce qualsiasi oggetto-immagine deposto sulla map in MapTool. Le modalità di interazione con uno specifico token dipendono dal Layer della Map dove vengono immessi. Questi layers sono illustrati qui in basso, perché è importante capire come agiscono sui tokens.
- Gli elementi deposti nel layer Token sono quelli che vengono considerati più comunemente "tokens" - rappresentano i personaggi, i mostri, i PNG (personaggi non giocanti) - le persone e creature del gioco.
- Gli elementi deposti nel layer Object sono le immagini che rappresentano gli arredamenti, i contenitori, le cose nel mondo di gioco - quello che una persona può manipolare o usare. MapTool continua a ritenerli tokens, naturalmente (per esso è tutto un token - ha veramente una mentalità restrittiva), ma per amor di chiarezza, molti utenti li chiamano oggetti per distinguerli dai token che rappresentano i personaggi
- Gli elementi deposti nel layer. Background sono tipicamente le cose che arricchiscono la map - muri, pareti rocciose, sporcizia, erba. Potrebbero essere unici, ma solitamente sono "stampati" sulla map più e più volte, sia a formare un disegno ben preciso o proprio perché state utilizzando diverse copie distinte della stessa immagine (ad esempio, utilizzare più muri per completare una stanza). Per questa ragione, molti utenti chiamano queste immagini francobolli.
The Hidden Layer
Avrete notato che non ho parlato del layer Hidden nel paragrafo precedente. Questo perché il Layer Hidden ha una finalità leggermente differente.
Mentre i layers Token, Object e Background hanno una relazione abbastanza intuitiva in termini concezione del mondo -- Io sono una persona o creatura, quell'elemento lì è un oggetto e tutto quello che ci circonda è lo sfondo -- il Layer Hidden è quello che non si vede. In MapTool qualsiasi cosa posizionata sul Layer Hidden è visibile solo dal GM fintanto che questi non decida di spostarla su un altro layer.
Generalmente su questo layer vorrete metterci personaggi e oggetti - non ci sono ragioni per inserirci francobolli di sfondo, malgrado io sia sicuro che voi potete già pensarne un paio.
E' sufficiente dirvi che quando piazzate un token su una map di MapTool dovete prestare attenzione al layer dove lo mettete!
Creare un nuovo Token
Creare un token consiste semplicemente nel trascinare un immagine dalla Resource Library al Layer Token della map. Ma come si fa a creare un immagine in primo luogo? ci sono diverse alternative.
Scaricare un Immagine
La comunità di utenti di MapTool ha creato una moltitudine di immagini-token pronte all'uso. Visitate la Galleria di RPTools per visionare le centinaia di immagini-token già pubblicate.
Crearne una attraverso TokenTool
Un altra alternativa è creare le vostre immagini utilizzando TokenTool, un programma sviluppato dagli stessi autori di MapTool per creare immagini-token in modo facile e veloce. Per creare un token usando TokenTool bisogna:
1. Scaricare TokenTool ed aprirlo facendo doppio clic sul file con estensione .jar (questo è un Java "JAR file", un eseguibile che avvierà un programma java).
2. Trovare un immagine che vi piace (siate cauti con il copyright!) e trascinatela sul riquadro a sinistra della finestra di TokenTool (questa è la sezione con un piccolo anello centrato sullo sfondo nero).
3. Quando compare l'immagine, trascinatela in giro con il mouse fintantoché la porzione che desiderate per il vostro token sia all'interno dell'anello. Potrete vedere un anteprima di come diverrà il token in alto a sinistra della finestra di TokenTool.
- Consiglio: Potete usare la rotellina del mouse o i pulsanti di ridimensionamento per regolare la grandezza dell'immagine per come vi sembra opportuno.
- Consiglio: Potete cambiare l'aspetto e il colore dei bordi, la grandezza finale del token e alcuni altri settaggi utilizzando i menu a tendina nella parte destra della finestra di TokenTool.
4. Quando avrete ottenuto ciò che volete, andate su File > Save Token e salvate il token appena creato in un percorso assegnato alla vostra Resource Library, oppure dove pianificate questo utilizzo. Notate che il file verrà salvato nel formato PNG (questa è buona cosa! le immagini *.png supportano le trasparenze che sono indispensabili per la creazione di pedine non necessariamente quadrate!).
5. Ritornate a MapTool e aggiungete o aggiornate la cartella nella vostra Resource Library, li vedrete apparire il vostro nuovo token! Trascinatelo sulla map e sarete apposto.
Disegnarla da te
Potete creare un immagine-token autonomamente usando programma di disegno e salvando il file in formato PNG o JPG in una cartella che è o sarà parte della vostra Resource Library. Il formato PNG è quello raccomandato per i tokens di MapTool perché consente le trasparenze e, sostanzialmente, rende meglio.
Indubbiamente potete anche miscelare l'utilizzo di tutti i metodi esposti per creare tokens belli e ben formati.
Editare un Token
Editare un token vuol dire cambiare le sue caratteristiche, siano esse le sue immagini, i suoi nomi o i suoi settaggi impostati. Le istruzioni per cambiare nomi, immagini e dimensioni di un token sono coperte nel capitolo Introduzione al Mapping.
La seguente sezione tratta delle varie opzioni, schede e menù a tendina nella finestra di dialogo Edit Token.
Tipi di Token
I Tokens sono di due possibili tipi (type) in MapTool: NPC e PC (PNG e PG). Questi termini saranno familiari ai giocatori di ruolo poiché stanno per "Player Character" e "Non-Player Character" (Personaggi Giocanti e Personaggi Non Giocanti), l'uso più comune di quest'impostazione "type" è di fare distinzione tra i due gruppi durante una partita vera e propria.
In generale, i tokens appartententi ai vostri giocatori dovrebbero avere il tipo "PC". I tokens appartenenti a voi (GM) dovrebbero avere il tipo "NPC".
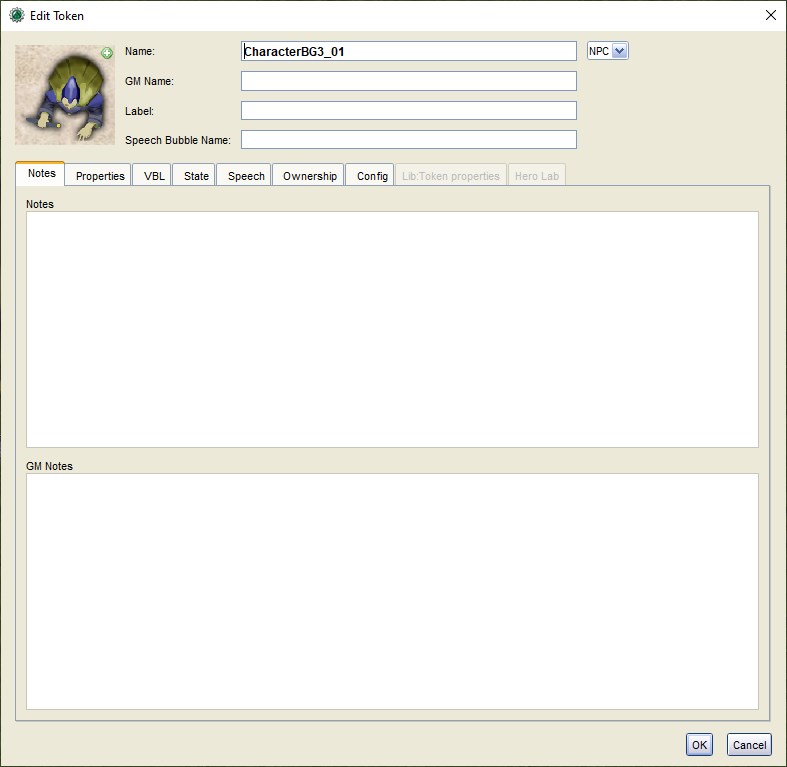
NOTA: Il type dei token non ha influenza su chi può manipolarli o vederne le proprietà - al contrario, questo potere è garantito agli owner o owners (proprietari) di quel token. Come GM, voi siete considerati possessori (ownership) di tutti i tokens su tutte le maps nelle campaign. Guardate Ownership più sotto per maggiori dettagli.
Per cambiare il type dei token:
1. Doppio-clic sul token per aprire la finestra di dialogo Edit Token.
2. Nell'angolo in alto a destra utilizzate il menù a tendina per selezionare PC o NPC.
3. Cliccate su OK.
Notes
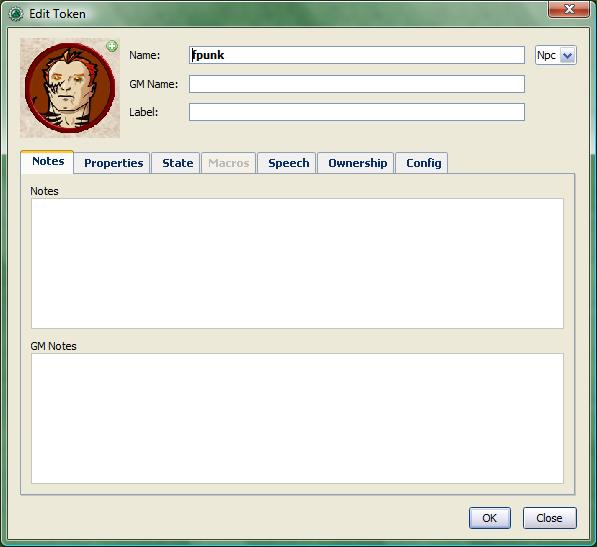
La scheda Notes presenta due aree dove potete inserire delle note approposito del token. Questi campi supportano i tag HTML base, così che possiate formattare la nota.
Il campo del testo in alto è li per le note disponibili e visibili per chiunque voglia vederle. Il campo in basso (intitolato GM Notes) è per le note che solo il/i GM possono vedere.
Le note sono un po' intricate - Maptool può esporle in un elegante finestra a comparsa, ma dovete fare un paio di cose prima.
- Inserire informazioni nei campi delle note di un token.
- Mettere questo token in un layer che non sia il "Token Layer" cliccandogli sopra con il pulsante destro del mouse e selezionando Change To >
- Essere sicuri di trovarsi o spostarsi nel Token Layer
Ora noterete che, quando posizionate il cursore sopra il token, il puntatore diventerà una mano. Se farete doppio-click, al posto della normale finestra di dialogo Edit Token, vedrete una piccola finestra a comparsa nell'angolo in basso a sinistra della mappa che visualizzerà le note.
La lezione da trarne è -- ove le note di un Token sono accessibili in diversi modi -- uno dei più comuni usi è quello di porre annotazioni e promemoria su token o oggetti depositati nell'"Object" o "Background" layer.
Properties
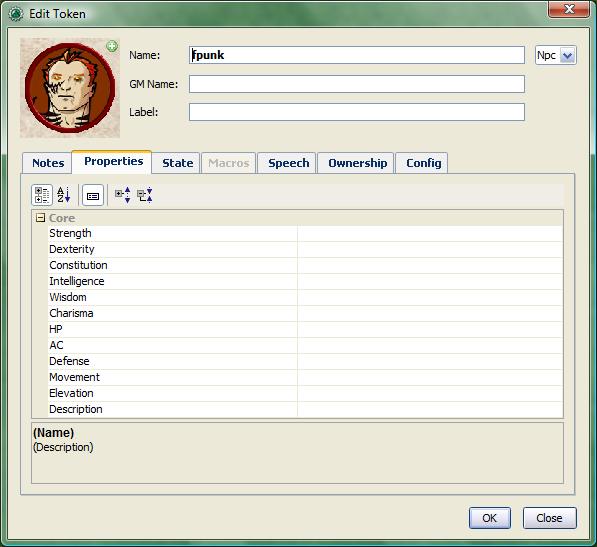
Properties are a topic that deserve their own guide, as they are heavily involved in the creation and use of token macros. This guide won't go into excruciating detail about properties, but will instead deal with only the most basic information about them.
Every token dropped onto a map in MapTool automatically gains a set of properties, which can basically be thought of as stats, characteristics, or traits (you know, the numbers on a character sheet). In effect, each token is carrying around it's own built-in character sheet. In programming terms, properties can thought of as variables that can be set to different values, and then used later by macros.
- Note: although people frequently refer to "token properties," the properties that are visible in the Edit Token dialog are only those properties that are set up for the specific campaign.
When you click on the Macros tab in the Edit Token dialog, you'll see a list of the properties that are currently set up for the Campaign you're using. If you've opened up a new campaign (or just started MapTool), you will see the default property set, which looks like:
- Strength
- Dexterity
- Constitution
- Intelligence
- Wisdom
- Charisma
- HP
- AC
- Defense
- Movement
- Elevation
- Description
For the rest of this guide, examples using properties will use the list above.
The property list you see is in a table (or spreadsheet) layout, with the property name on the left, and a blank space on the right. In the space on the right, you can enter the value you want to assign to that property. You can enter text, numbers, or in more advanced cases, macro statements as the value for a particular property.
Once you do that, and hit OK, that property on that token will be assigned the value you enter. Later on, if you write macros, you can refer to those properties to make calculations or roll dice.
Since properties are such a major topic on their own, check out the Introduction to Properties guide for detailed information.
State
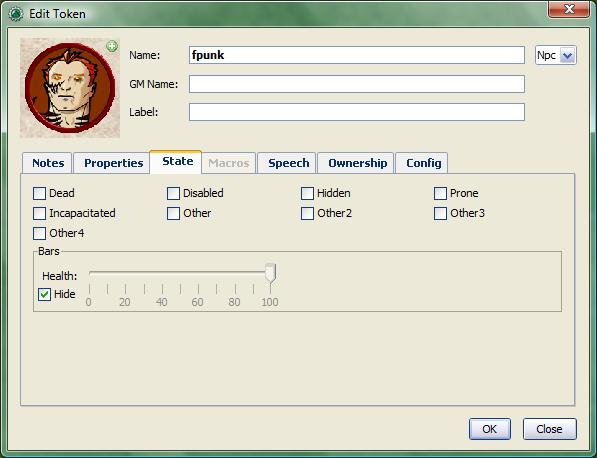
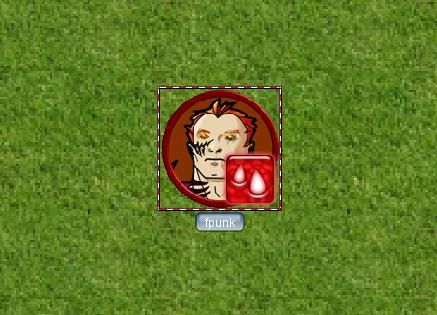
States are visual markers that can be applied to a token (typically appearing as an image superimposed on the token) that can be used for any sort of reminder that you might need in a game. For instance, if you want a marker that a particular NPC token is "dead", you can set the state "Dead" on the token, and whatever image you've selected to indicate "Dead" will appear on the token.
The default states that load when MapTool starts are:
- Dead
- Disabled
- Hidden
- Prone
- Incapacitated
- Other
- Other 2
- Other 3
- Other 4
Health Bar
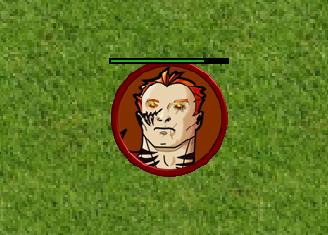
The State tab also contains the setting information for the bars that the token displays or can display. These bars are shown superimposed over the token (at the top, bottom, or sides), and can be used to track things like health (or ammunition, magic, or anything that can be lost or expended).
Macros
As of MapTool version 1.3.b54, the Macros tab is no longer enabled. This tab originally held the token macros, but as macro capabilities became more advanced, this tab became less and less useful, until finally, it was removed. It is present in earlier versions, though, if you want to take a look.
Speech
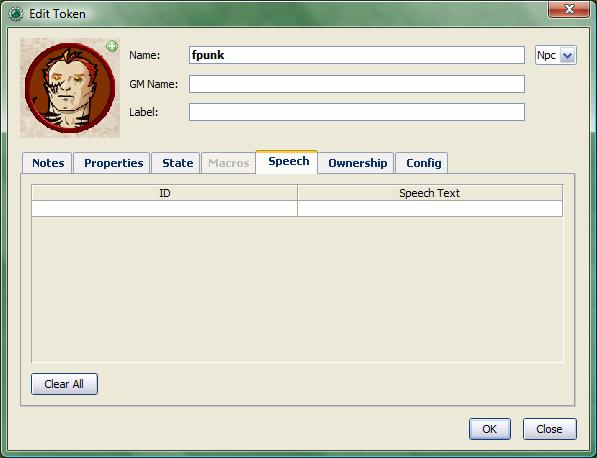
This tab contains the token's speech list. You can use this tab to configure sayings, aphorisms, battlecries, and anything you might want your token to "say" in chat. There are two fields for each speech item:
- ID: This field is the short identifier you assign to a speech item; the ID is used in chat to refer to the full text of the speech. It can be alphanumeric, so you could use number, or letters, or a mix. It cannot have any spaces in it, though!
- Speech Text: This is the actual text that will be displayed in the chat window.
To use a speech item, do the following:
- Select the token you want to have "say" something
- In the chat window, enter /tsay (ID), where "(ID)" is replaced by the actual ID of the speech item. So if you wanted to howl your battlecry - which you've cleverly given the ID "bcry" - you would select your token, and enter /tsay cry in the chat window.
Ownership
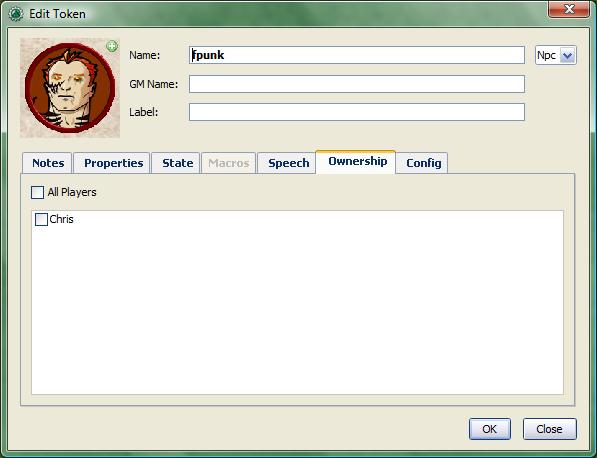
Token ownership determines who among the players connected to the game is allowed to select, move, or view the details of a given token.
If you are the owner of a token, you may select it, double-click on it to open and edit it, and move it around on the map. If you are not an owner of a particular token, you are limited to looking at it on the map -- you will not be able to select, move, or view its properties and configuration.
To set an owner, simply check the box next to that individual's name. The names shown in the box will be the names of each player (including the GM) connected to the game (so if you're looking at the Ownership tab when nobody else is connected, you'll see only your own name). If you want to give ownership to all players, just check All Players.
(Note that the selection of options when the server is started must include Strict token ownership if you want the functionality described above. See Introduction to Game Hosting#Starting Up a MapTool Server for details on server options.)
Config
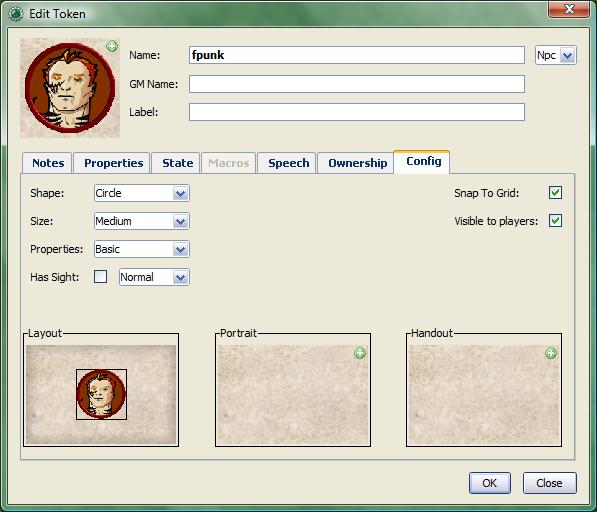
This tab contains a number of settings that affect how the token looks, moves, and interacts with MapTool.
Shape
Tokens can have three shapes in MapTool:
- Top Down: top-down tokens are usually hand-drawn or rendered images of creatures, objects, and people as if you were looking down from an aerial view. Setting the token shape to Top-down tells MapTool to allow the token image to rotate when you right-click on the token and select Change Facing (that way, your top-down token can turn to face its enemies!)
- Circle: circular tokens are like pogs or poker chips - round images that represent the creature or character. Because they are markers and not meant to be realistic "top-down" views of a creature, when you select Change Facing, instead of rotating the image - which would look bad - a small yellow arrow appears to indicate facing.
- Square: square tokens work like circular tokens, except that they are...wait for it...square.
Size
A token can be given a number of sizes, which scale the token image larger or smaller.
The available size depend on the map grid used when setting up a map. If you set a map with a grid (hexagonal or square), you will have the Free Size option (which lets you scale the token as you need), or a number of sizes from "Fine" to "Colossal" (if you play D&D, you'll probably recognize them).
If you do not set a grid when you create the map, you will be able to scale the token along a number scale, from -11 to +20.
Properties
This field allows you to indicate which of the available property sets in the campaign this token has. The designer of a campaign can set up different sets of properties to be used by different tokens (for instance, a set of properties for player character tokens, and a different set of properties for non-player character tokens). This field lets you pick which property set to use.
Has Sight
This field allows you to indicate what kind of sight the token possesses. Sight settings allow the gamemaster to simulate darkness, light, hidden objects, and hiding enemies.
Snap to Grid
This checkbox simply indicates that the token snaps to the existing grid when it is moved. If unchecked, the token does not pay any heed to the grid when it is dragged around on the map.
Visible to Players
This checkbox lets you designate a particular token as invisible to players - when checked, no player connected to the game will be able to see the token or interact with it in any way.
Layout, Portrait, and Handout
There are three fields dealing with the token's visual appearance:
- Layout: this shows how the token will look on the map
- Portrait: this is a separate image that will appear in the lower left corner of the map screen when you hover over the token
- Handout: this lets you designate an image to appear when you right-click on the token and select Show Handout