Introduction to Macro Writing/de: Difference between revisions
(translation continued :)) |
(wieder etwas weiter übersetzt) |
||
| Line 163: | Line 163: | ||
* Allgemein | * Allgemein | ||
Du nsolltest nun die Fenster wie in der Abbildung (oder so ähnlich) in Maptool sehen.In der Abbildung sind im Fenster "Allgemein" eine ganze Reihe an Schaltflächen zu sehen. Jede dieser Schaltflächen führt ein Makro aus; sie entstehen, wenn du ein neues Makro erstellst. | |||
''' | '''Bitte beachte''', dass die Makros im Fenster "Allgemein" nur auf ''deinem'' Rechner und nur in ''deiner'' Installation von Maptool vorhanden sind.Die Schaltflächen im Screenshot sind ''meine'' Allgemeinen Makros; deine... naja, die wirst du selber schreiben müssen. | ||
=== | ===Die Fenster Ausgewählt und Verkörpern=== | ||
Es gibt zei Makrofenster, die sich direkt mit Spielmarken beschäftigen: Ausgewählt und Verkörpern. | |||
Das '''Ausgewählt'''-Fenster enthält Schaltflächen, die direkt zu der von dir gerade markierten Spielmarke gehören. Sie sind also ein Teil der Spielmarke, auf die du mit der Maus geklickt hast. Jede dieser Schaltflächen führt eine Reihe von Makrobefehlen aus. | |||
Das '''Verkörpern'''-Fenster enthält entsprechend die Makro-Schaltflächen der Spielmarke, die du gerade verkörperst, d.h. deren Identität du gerade annimmst. Im Chat erscheinen deshalb deine Nachrichten so, als würde die Spielmareke sprechen. Es ist möglich, eine Spielmarke zu verkörpern und gleichzeitig eine andere ausgewählt zu haben. Du solltest deshalb immer darauf achten, auf welchen Makrofenster du gerade bist. | |||
=== | ===Das Kampagne-Fenster=== | ||
Dieses Fenster zeigt die Makro-Schaltflächen der gerade geladenen Kampagne und kann, je nach Einstellungen des Servers, mit den anderen Spielern geteilt werden oder nicht. Spieler (also alle außer der Spielleitung) können hier keine Makros hinzufügen oder entfernen (siehe auch [[Managing Macros in Panels/de|Makros in Fenstern verwalten]]). | |||
=== | ===SL-Fenster=== | ||
Makros im Fenster SL gehören ebenfalls zur Kampagne, werden aber nur der Spielleitung angezeigt. | |||
===Global Panel=== | ===Global Panel=== | ||
Revision as of 23:50, 16 June 2023
BEGINNER
THIS IS A BEGINNER ARTICLE
Das Einzig Wirklich Wichtige hier: Code Syntax
Wenn du bisher nie Code geschrieben hast, wird das nun Folgende erst einmal KEINEN Sinn für dich machen (aber lies weiter). Hier findest du die wichtigsten Grundlagen zu (MT-)Makros in MapTool. Wenn du am Ende dieses (recht langen) Textes angekommen bist, kommwieder hierher und lies noch einmal.. Wenn du dann deinen ersten Code geschrieben hast, komm nochmal her und lies wieder. Dann wird das hier Gelesene immer mehr Sinn machen bis du irgendwann irgendwann komplett durchblickst ("Heureka"). Dann wirst du verstehen, warum das hier er wichtigste Teil des Wikis ist. :D Gutes Gelingen.
Wenn du dich mit dem Coden auskennst und du das hier auf Anhieb verstehst, wirst du gleich verstehen, warum das hier der wichtigste Teil des Wikis ist.
Wie immer bei Code gibt es eine Syntax, an die du dich halten musst. ALLE Maptool Skript-/Codezeilen bestehen aus 0 oder mehr Optionen und einer Funktion bzw. einem Ausdruck (mit einer Ausnahme: [code():]).
Eine Option ist etwas, was die Ausgabe im Chatfenster beeinflusst, zum Beispiel:
- Die Option [h:] versteckt (engl. hide) die Ausgabe des Ergebnisses der Funktion
- Die Option [r:] zeigt nur das Ergebnis (engl. result)
- Die Option [if():] zeigt nur das eine oder andere Ergebnis anzeigen (abhängig davon, wie die Prüfung ausfällt)
Wenn es keine Optionen gibt, wird die gesamte Ausführung der Funktion im Chat ausgegeben.
Beachte, dass es viel mehr Würfeloptionen gibt.
Ein Ausdruck ist ein Wert oder eine Kombination von Werten und Operatoren (wie '+', '-', '*', '/', etc.).
Eine Funktion ist etwas, das ein Ergebnis zurückliefert. Du hast also einen Ausgangswert (oder mehrere) und wendest darauf eine Funktion an, um ein Ergebnis zu bekommen. Das Ergebnis entsteht also aus dem Ausgangswert, indem er von der Funktion verarbeitet wird. Beispiele:
- Die Funktion abs() gibt den positiven Wert einer Zahl (=Ausagangswert), indem es das Minuszeichen entfernt, sofern eins vorhanden war.
abs(-3)ergibt also 3. Der Ausgangswert ist -3 und das Ergebnis ist 3. - Die Funktion if() (es gibt sowohl eine Option [if():]als auch eine Funktion if()) erhält zwei Ausgangswerte und eine Bedingung. Sie gibt den ersten Ausgangswert (oder eine Berechnung daraus) zurück, wenn die Bedingung wahr ist oder entsprechend den zweiten Wert (oder die Berechnung mit dem zweiten Wert), wenn die Bedingung falsch ist. Die Funktion
if(0,"Black", "White")gibt also "White" zurück, da der Rechner "0" also falsch interpretiert. Anmerkung: Da dies eine Funktion ist, werden beide möglichen Ergebnisse berechnet aber nur eins von beiden wird zurückgegeben.
Aufbau von Funktionen
Allgemein sieht eine Funktion immer so aus:
[option, option, ...: ergebnis = funktion(wert, parameter)]
z.B.
 [h: var = 2]
 [h: ergebnis = if(var == 3, "die Aussage ist richtig", "die Aussage ist falsch")]
 [r,s:  ergebnis]
Erläuterung (hier erst einmal sehr ausführlich):
 Erste Zeile: h (Option: zeige nichts im Chat an): var (ein Wert mit dem Namen var) = 2
 Zweite Zeile: h (Option: zeige nichts im Chat an): ergebnis (ein Wert mit dem Namen ergbenis) = (das Ergebnis der Funktion) if
     (Die Bedingung von) if (prüft, ob) var == 3 (, ob also 2 genau so groß ist wie 3; die Bedingung ist also falsch)
     (Die Funktion gibt also das zweite Ergebnis an die Variable ergebnis zurück, weil die Bedingung falsch ist.)
 Dritte Zeile: r (zeige das Ergebnis), s (und zwar nur dem Ausführenden): ergebnis (schreibe den Wert der Variable ergebnis in den Chat)
Im Chat erscheint nun:
die Aussage ist falsch
Beachte, dass JEDES Skript mit einer eckigen Klammer "[" beginnt und endet "]". Wenn Optionen verwendet werden, werden sie immer durch EINEN Doppelpunkt ":" von der Funktion getrennt. Wenn du mehr als eine Option verwenden möchtest, werden diese durch Kommata "," getrennt. Es gibt NIE mehr als EINE von diesen drei ("[", "]" and ":") Zeichenin einer Skriptaussage. Alles AUSSERHALB der beiden Klammern "[" "]" ist Klartext (oder HTML) und KEIN Code, egal was darin steht. Dieser Klar- oder HTML-Text wird IMMER unverändert im Chatfenster erscheinen und kann nicht durch Code beeinflusst werden.
Wie gesagt, mag das jetzt keinen Sinn ergeben haben. Schreib es auf einen Zettel, pinne ihn dir irgendwohin und lies es hin und wieder. Es wird Sinn machen!
Zeichenkette contra Variable
Eine weitere häufige Panne ist für Anfänger die Behandlung von Zeichenketten gegenüber Variablen. Wenn der vorige Satz dir nichts erklärt, dann sieh dir den folgenden Code an:
[variable = "String"]
Eine Variable ist ein Gefäß in dem man irgendetwas aufbewahren kann. Eine Zeichenkette ("String") ist ein Stück Text (der aus Buchstaben, Ziffern und Satzzeichen besteht), der in Anführungszeichen eingeschlossen ist. Das können einfache oder doppelte (Gänsefüßchen) sein. Beachte, das du auch eine Zahl (z.B. 50) in eine Variable packen kannst. Zahlen unterscheiden sich von Zahlenzeichenketten durch die fehlenden Anführungszeichen. Aus diesem Grund kann eine Variable nicht mit einer Zahl beginnen! (MapTool wäre sehr verwirrt.) Beispiele:
 FALSCH: [42Variable = "Hello World"] (Es kann wirklich seltsamer Kram passieren, wenn du sowas schreibst)
 RICHTIG: [Variable42 = "Hello World"]
Beachte: Code ist alles IN den [Klammern]; außerhalb ist alles einfacher Text. Es ist egal, ob dort etwas in Anführungszeichen steht oder nicht: Es ist Text.
Auch wichtig zu unterscheiden ist, dass der Wert einer Variable eine Zahl oder ein Text sein kann:
 [variable = 42] 42 als Zahl gespeichert
 [variable = "42"] 42 als Text gespeichert
Aber... (und das kann wirklich richtig nerven) sobald eine Zeichenkette, die nur aus Ziffern besteht, in einer Aussage verwendet wird, wird sie automatisch in eine Zahl konvertiert!! Das kann für viel Verwissung sorgen. Hier der Grund:
 [x = 21 + 21] speichert die Zahl 42 in der Variable x
 [y = "21" + "21"] or [y = "21" + 21] speichert die ZAHL 2121 in der Variable y
Hier nimmt MapTool den falschen Weg:
 [x = "2"]
 [y = "3"]
 [z = x + y]
Das sollte 23 ergeben, es wird aber zum Ergebnis 5 führen!! Der einzige Weg, um MapTool zu zwingen, die Werte der Variablen als Text zu interpretieren besteht darin, eine Variable mit einem leeren Text zu verbinden:
[z = x + (y+"")]
Das ergibt 23. Die Variable y wird hier gezwungen, sich wie eine Zeichenkette zu verhalten und dann mit der als Zahl interpretierten Variable x verbunden. Da x mit einer Zeichenkette nicht addiert werden kann, verhält auch sie sich nun als Zeichenkette.
Wenn du hierher wegen des Verweises 'lies das' kamst, dann kannst du hier erst einmal aufhören. Was bis hier stand war der 'musst du gelesen haben'-Teil. Wenn du ein Anfänger bist, dann lies weiter.
Was ist ein Makro?
Wie schon im Artikel zu den Spielmarken-Makros erwähnt, ist ein Makro einfach ein Weg, Aufgaben in MapTool zu automatisieren. Im Wesentlichen sind Makros Skripte, die von einem Parser gelesen wird, der sie interpretiert und dafür sorgt, dass die richtigen Dinge am richtigen Ort passieren, z.B. dass zwei Zahlen addiert werden statt das alles einfach nur als Text im Chat ausgegeben wird.
Makros starteten in MapTool ganz klein, wurden aber inzwischen zu einer umfangreichen Programmiersprache mit einem vielfältigen Satz an Kommandos und Funktionen, die fast alles können, was du dir nur vorstellen kannst.
Was du schon wissen solltest
Makros sind der Punkt, an dem wir in die mächtigeren - und komplexeren - Möglichkeiten von Maptool eintauchen. Auch wenn diese Anleitung für Einsteiger sein soll, müssen an dieser Stelle einige Dinge vorausgesetzt werden:
- Du hast die Einführung ins Kartenzeichnen gelesen, bist also vertraut mit der MapTool-Oberfläche und weißt, wie man Karten erstellt, Kampagnendateien speichert und Spielmarken auf der Karte platziert.
- Du hast auch Erstellung und Nutzung von Spielmarken gelesen und hast eine grundsätzliche Vorstellung davon, wie man mit Spielmarken umgeht, wie man ihre Eigenschaften aufruft usw.
- Schließlich, da Makros sehr stark mit den Eigenschaften von Spielmarken (und Kampagnen) agieren, hast du die Eigenschaften in MapTool durchgearbeitet, eine neue Kampagne auf Basis des MTRPG Regelwerks erstellt. Hast du das nicht getan, dann tu das jetzt. Nur so machen die weiteren Erklärungen und Beispiele Sinn.
Voraussetzungen schaffen
Eine wichtige Voraussetzung ist, dass eine bestimmte Einstellung in MapTool gesetzt ist, damit die folgenden Beispiele auch funktionieren. Es geht um Hilfetexte für eingebettete Würfelwürfe verwenden, die unbedingt aktiv sein muss. Zur Erläuterung:
Im Standard wird bei der Ausführung von Macros alles in Chat ausgegeben, was im Makro passiert. Das ist bei kleinen Macros nicht weiter wild und sieht vielleicht so aus:
- Angriffswurf: « Wurf + Bonus = 18 + 9 = 27 » gegen AC
Ein bißchen hässlich, aber nicht schlimm. Bei schwierigeren Aufgaben eines Makros kann das dann aber anders aussehen:
- Giftwolke gegen: « angriff = 1d20+angriffBonus = angriff = (4 + 7) = 11 » « schaden = 1d6 + 2 = schaden = (5 + 2) = 7 » Ziel 0: Angriff 11; « schaden = 7 » schaden. « angriff = 1d20+anngriffBonus = angriff = (14 + 7) = 21 » « schaden = 1d6 + 2 = schaden = (3 + 2) = 5 » Ziel 1: Angriff 21; « schaden = 5 » schaden. « angriff = 1d20+angriffBonus = angriff = (6 + 7) = 13 » « schaden = 1d6 + 2 = schaden = (1 + 2) = 3 » Ziel 2: Angriff 13; « schaden = 3 » schaden. « angriff = 1d20+angriffBonus = angriff = (17 + 7) = 24 » « schaden = 1d6 + 2 = schaden = (2 + 2) = 4 » Ziel 3: Angriff 24; « schaden = 4 » schaden.
Das ist wirklich nicht mehr lesbar und kaum zu verstehen.
Um zu vermeiden, dass diese Verarbeitungsinformationen des Makros im Chat ausgegeben werden, aktivierst du die oben genannte Einstellung und die Ausgabe landet stattdessen im Tooltip (und ist nur noch zu sehen, wenn du im Chat mit der Maus über das Ergebnis fährst).
- Öffne das Menü Bearbeiten > Eigenschaften.
- Auf der rechten Seite des Reiters Interaktionen ist der Bereich "Chat". Stelle sicher, dass hier Hilfetexte für eingebettete Würfelwürfe verwenden markiert ist.
- Bestätige mit OK.
Die gerade beschriebenen Schritte sorgen dafür, dass die Einzelschritte eines Makros nicht mehr direkt im Chat ausgegeben werden, sondern nur noch im Tooltip des Ergebnisses angezeigt werden. Du kannst sie also immer noch sehen, wenn du die Maus über das Ergebnis im Chat ziehst.
Schreibweisen
Ich werde versuchen, mich im Folgenden an diese Schreibweisen zu halten, um es verständlich zu halten:
- Makro bezeichnet eine Reihe verknüpfter Kommandos, die eine bestimmte Aufgabe erledigen.
- Makrokommando bezeichnet ein bestimmtes individuelles Kommando oder eine Funktion, die in einem Makro verwendet wird.
- Makro-Sprache bezeichnet die Gesamtheit aller Kommandos, Funktionen und Operationen, die in einem Makro verwendet werden können. Du findest eine große Sammlung in der Makrofunktionsliste.
Auch wenn es möglich ist, in MapTool ein Makro aus dem anderen heraus anzustoßen (man nennt das "(auf)rufen" eines anderen Makros), werden wir in diesem Dokument Makros nur über Schaltflächen in den verschiedenen Makrofenstern starteen und sie wirken nur auf die Spielmarke, auf der sie aufgerufen werden.
Warum soll ich die denn nutzen?
Es ist nicht nötig, Makros in MapTool überhaupt zu nutzen. Der zentrale Zweck von MapTool ist es, Karten mit Freunden zu teilen und darauf zu spielen - all das, was in "Einführung ins Kartenzeichnen" und Hosten von Spielrunden beschrieben steht. MapTool stellt all das auch ohne Makros bereit: Karten, Spielmarken, einen Chat und Würfel.
Trotzdem kann man noch viel mehr mit MapTool anstellen. Beispielsweise gibt es in vielen Spielen Situationen, wo man würfelt und einen Bonus addiert oder von einem anderen Wert abzieht. Solche Dinge kommen bei manchen Spielen sehr häufig vor und man kann sie mit Makros automatisieren. Makros sind wie Taschenrechner: Man muss sie nicht nutzen... es ist aber praktisch. Im Folgenden wird erklärt, wie man ins Thema einsteigen kann...
Wo sind diese sogenannten "Makros"?
Makros können an ganz verschiedenen Stellen von MapTools auftauschen. Der Grund dafür ist, dass sie sich auch auf ganz verschiedene Bereiche auswirken können. Praktisch betrachtet gibt es vier Orte, an denen ein Makro sein kann:
Spielmarken-Makros
Der erste und häufigste Ort, an dem Makros eingesetzt werden können, sind Spielmarken. Sie sind verbunden mit der Spielmarke in der sie "leben" und wandern mit ihr herum. Nur wer die Spielmarke besitzt, kann das Makro darin nutzen. Jemand anders sieht nicht einmal, dass die Spielmarke ein Makro hat.
Kampagnen-Makros
Kampagnenmakros sind nicht an eine Spielmarke gebunden, sondern an die Kampagne selbst. Sie funktionieren genau wie das Makro einer Spielmarke mit Ausnahme dieser Eigenschaften:
- Du musst nicht irgendwas auswählen, um die Makros zu sehen
- Jeder (in der Kampagne) kann sie sehen und ausführen
Kampagnenmakros sind ziemlich hilfreich für die Spielleitung un die Spieler, um allgemeine Funktionen zu verteilen. Man muss das Makro nicht erst zu jedem kopieren - es ist bereits da, wenn jemand die Kampagne startet oder sich an ihr anmeldet.
Spielleitungs-Makros
SL-Makros sind im Grunde Kampagnenmakros. Der Unterschied ist, dass nur die SL sie sehen und ausführen kann.
Allgemeine Makros
Globale oder Allgemeine Makros sind nicht an eine Spielmarke oder eine Kampagne gebunden - sie werden mit deinen Einstellungen zu Maptool gespeichert. Sie sind also verfügbar, egal welche Kampagne du gestartet hast. Sie sind nur lokal bei dir sichtbar.
Es ist also ein guter Ort, um solche Makros zu plazieren die sonst keiner sehen soll - Dinge, die deinen Spielern verborgen bleiben sollen, solange du das willst oder Aufgaben, die deine NSCs betreffen.
Die Makrofenster
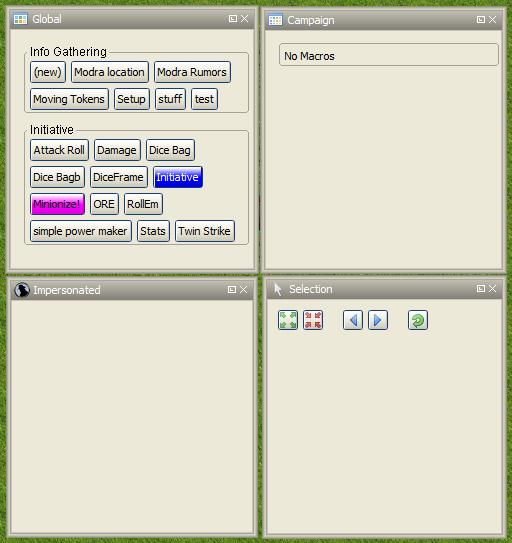
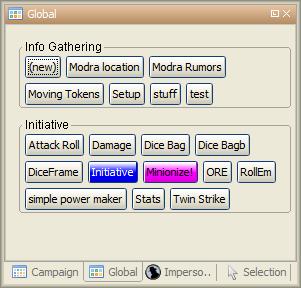
Du fragst dich vielleicht, wo denn nun all diese Makros und ihre Schaltflächen versteckt sind? Du findest sie in den fünf vorhandenen Makrofenstern. Im Fenster-Menü kannst du sie aufrufen und auf der Karte so positionieren, wie es für dich passt. Hake die folgenden Einträge an:
- Ausgewählt
- Verkörpert
- Kampagne
- SL
- Allgemein
Du nsolltest nun die Fenster wie in der Abbildung (oder so ähnlich) in Maptool sehen.In der Abbildung sind im Fenster "Allgemein" eine ganze Reihe an Schaltflächen zu sehen. Jede dieser Schaltflächen führt ein Makro aus; sie entstehen, wenn du ein neues Makro erstellst.
Bitte beachte, dass die Makros im Fenster "Allgemein" nur auf deinem Rechner und nur in deiner Installation von Maptool vorhanden sind.Die Schaltflächen im Screenshot sind meine Allgemeinen Makros; deine... naja, die wirst du selber schreiben müssen.
Die Fenster Ausgewählt und Verkörpern
Es gibt zei Makrofenster, die sich direkt mit Spielmarken beschäftigen: Ausgewählt und Verkörpern.
Das Ausgewählt-Fenster enthält Schaltflächen, die direkt zu der von dir gerade markierten Spielmarke gehören. Sie sind also ein Teil der Spielmarke, auf die du mit der Maus geklickt hast. Jede dieser Schaltflächen führt eine Reihe von Makrobefehlen aus.
Das Verkörpern-Fenster enthält entsprechend die Makro-Schaltflächen der Spielmarke, die du gerade verkörperst, d.h. deren Identität du gerade annimmst. Im Chat erscheinen deshalb deine Nachrichten so, als würde die Spielmareke sprechen. Es ist möglich, eine Spielmarke zu verkörpern und gleichzeitig eine andere ausgewählt zu haben. Du solltest deshalb immer darauf achten, auf welchen Makrofenster du gerade bist.
Das Kampagne-Fenster
Dieses Fenster zeigt die Makro-Schaltflächen der gerade geladenen Kampagne und kann, je nach Einstellungen des Servers, mit den anderen Spielern geteilt werden oder nicht. Spieler (also alle außer der Spielleitung) können hier keine Makros hinzufügen oder entfernen (siehe auch Makros in Fenstern verwalten).
SL-Fenster
Makros im Fenster SL gehören ebenfalls zur Kampagne, werden aber nur der Spielleitung angezeigt.
Global Panel
This panel contains the Global Macros you've set up. Remember, these are only visible to you.
Before You Go Any Further: The Basics
Before we proceed, there are some essential elements of the macro syntax you need to understand, or unpredictable things will happen. Macros originated as ways to script short sections of text and very brief dice rolls, which were sent to the chat window. So, if you wanted a battle cry to be displayed, but didn't want to retype it every time, you could write a "macro" to send that battle cry to the chat window. Likewise, if you always rolled 2d6 to make an attack, you could write a macro to generate that output, rather than typing /roll 2d6 every time you needed to roll.
From there, it grew - the macro commands became more complex until they were almost a programming language; but they're still just a bunch of text passed to a parser, which handled all the commands in the macro, and generated results.
So, one of the big things to remember is this:
IMPORTANT: Macros are a sequence of text containing both text you want to display in chat AND special commands that do things like make dice rolls.
The Current Token
Before you begin writing macros, please consult the page on the Current Token concept. When you write macros, you will usually - unless the macros are very minimal - be manipulating Token Properties. In order to manipulate the correct set of properties with your macro, it is crucial to understand the concept of the Current Token.
IMPORTANT: A macro always refers to the Current Token, unless you explicitly instruct the functions/operations of that macro to address a token other than the Current Token.
Brackets and Braces
Now, because they are plain text, there must be a way to distinguish the parts that are just text to send to chat, and the parts that are "programming commands." MapTool handles that by enclosing the programming commands in brackets - either the square brackets, [ ], or the curly braces, { } .
IMPORTANT: Anything found in between square brackets or curly braces is handled not as regular text, but as a command to the parser to do something. Likewise, if it's not between curly braces or square brackets, it is sent to the chat window as text.
So, something like:
[1d20]or
{1d20}is not telling MapTool to send the text [1d20] or {1d20} to chat; rather, it's saying "generate a random number between 1 and 20 and send that to the chat window." The brackets and braces (although braces aren't recommended for use anymore, due to complications they cause with the branching and looping functions) indicate to MapTool that the information between them is a macro command or variable, and not just text. So, as you'll see later, you can mix text and macro commands:
I roll [1d20+4] for initiative.in a macro will replace the [1d20+4] with the result of that dice expression, and then print the entire sentence to chat, so it looks something like:
I roll 16 for initiative.Roll Options
Roll Options are another special feature of the macro language. Their name is somewhat of a legacy - since most macros were dice rolls (e.g. the aforementioned [1d20+4], there was a request to have different ways to display them (or not display them at all). Since those options were used to change how a roll appeared, they were called Roll Options, and the name stuck. In fact, it's still applicable, even though the options no longer really just handle how something is displayed.
Roll Options are a critical thing to understand in macro writing. There are a couple of rules. First, the general format of any macro command in MapTool is this:
[(comma-list-of-options): operation(s)]Now, to explain: a roll option has the following rules:
- It always goes at the beginning of a macro statement (for our purposes, a statement is any macro line between square brackets).
- It is always followed by a colon.
- It may be combined with other roll options; if so, you separate each option with a comma, and at the end of the comma-separated list, you put a single colon.
- It needs to appear only once in a given macro statement for it to apply to the operations contained within. This gets tricky when you start using the CODE roll option, since you can begin to nest entire, separate statements, but that is explained in the sections on branching and looping.
A simple example of a roll option is this:
[r:1d20+4]That uses the "regular output" roll option to display the result of 1d20+4 as plain text (without highlighting or tooltips). A complex example might look like this:
[h: d20roll = 1d20]
[h,if(d20roll == 20): output = "Critical Hit"; output = "Not a Critical Hit"]
This combines the [h: ] roll option (which means, "hide this from the chat window"), and the [if(): ] roll option, which performs an if-then operation. Note, though, the roll options all appear only at the beginning of the macro statement to which they apply.
A very complex example might involve the use of the [CODE: ] roll option (learn more about that at Introduction to Macro Branching) to allow you to nest entire macro statements within blocks to be executed as if they were a single statement. For instance:
[h: d20roll = 1d20]
[h,if(d20roll == 20),CODE:
{
    [damageAmount = 16]
    [damageType = "acid"]
    [TargetHP = TargetHP - damageAmount]
};
{
    [damageAmount = 1d10+6]
    [damageType = "acid"]
    [TargetHP = TargetHP - damageAmount]
}]
This is a complex statement, but the roll options for the overall command (the outermost set of square brackets) are all at the beginning, separated by commas, and followed by a single colon. The inner statements are nested.
Quotes and Apostrophes
Under most circumstances, macros containing single quotes (or apostrophes) will work fine - they're just text, and thus they will be sent to the chat window without issue. However, there are certain situations where a lone, or unmatched, single quote will cause MapTool to think you have created an unterminated string. When that happens, the text of the macro (all the commands, etc.) is usually dumped to chat, resulting in a big block of ugly output.
To avoid this, remember this rule: if you have text that you wish to appear in chat contained between a set of square brackets or curly braces, a lone quote character (single or double quotes) will cause an error. So, modifying the example above:
[h: d20roll = 1d20]
[h,if(d20roll == 20),CODE:
{
    [damageAmount = 16]
    [damageType = "acid"]
    [TargetHP = TargetHP - damageAmount]
    The target's HP is now [r:TargetHP].
};
{
    [damageAmount = 1d10+6]
    [damageType = "acid"]
    [TargetHP = TargetHP - damageAmount]
}]
The single quote character in the line The target's HP is now [r:TargetHP] will cause an error. There are two ways around this:
- Don't use apostrophes. This can be a bit awkward.
- Replace the apostrophe with the HTML character code for the single quote:
'
Comments
THERE IS NO COMMENT MECHANISM IN THE MACRO CODE. ALL PROPERLY WRITTEN MACRO COMMANDS IN A MACRO WILL BE EXECUTED.
The macro language directs all of the content of a macro through the built-in parser, looking for text to send to chat and commands to execute. It is possible to hide output from the chat window in a couple of fashions, but it is not possible to prevent the execution of properly written macro commands. In other words, you cannot comment out code.
There are two ways to hide output: the [h:], or "hidden", roll option, and HTML comment format. The hidden roll option you've already seen, but if you're not familiar with HTML, comments in HTML look like this:
<!--This is an HTML comment-->
In an actual HTML page, anything between the <!-- and --> is completely ignored. In contrast, in MapTool's macro language, anything between the comment tags is hidden from chat, but if you embed macro commands in there, they will be executed. In other words, in a macro, if you have this line:
<!--In this part of the macro I roll some dice-->
it will be hidden from chat and act like a comment. However, if the line said:
<!--In this part of the macro I roll some dice using the format [r:1d20+9]-->
the parser will hide all that from chat, but it will perform that macro command, whether you want it to or not.
The lesson to be learned here: You cannot comment out macro code.
Writing Macros
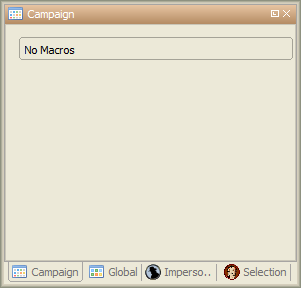
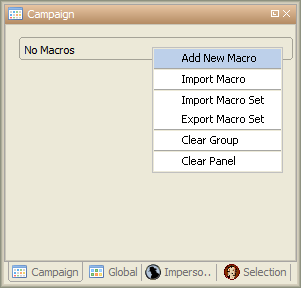
Macro creation is a three-step procedure (though those three steps can contain multitudes!):
1. Right-click on the panel where you want the macro to appear (either one of the token panels, the Campaign panel, or the Global panel) and select Add New Macro. A gray button with the label (new) will appear.
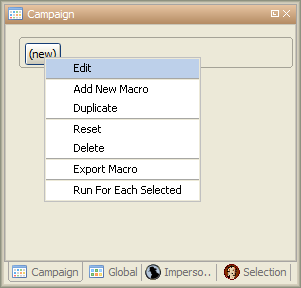
2. Right-click on the button, and select Edit.
3. Enter your macro code, give it a name, and hit OK. There! You've created a macro!
But wait...what do you mean, "macro code?"
As I said, those three steps can contain a huge amount of details, steps, tips, tricks, victories, failures, frustrations, and sometimes, hollering and gnashing of teeth. So, we'll take a step back and look at some very simple macros in a step-by-step fashion. If you want to see what some advanced macros can look like, there are plenty of tutorials and how-tos on this wiki to read through. For now, though, we'll do some simple, but useful, macro writing.
Roll for Initiative
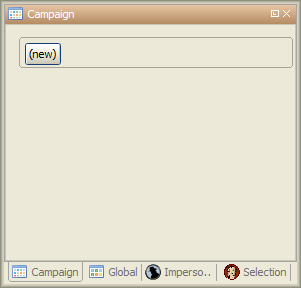
The simplest macros are no more than text, which is output to the chat window. In effect, a macro containing text (in fact, all macros) just send a string of commands to the chat window where it is read and interpreted. Most programming languages start off with the classic "Hello World!" program, so this guide is not going to do that. Instead, let's do something a bit more RPG: create the dreaded "Roll for Initiative!" message!
1. Select the Campaign Panel.
2. Right-click on it, and select Add New Macro.
3. Right-click on the new macro button, and click Edit.
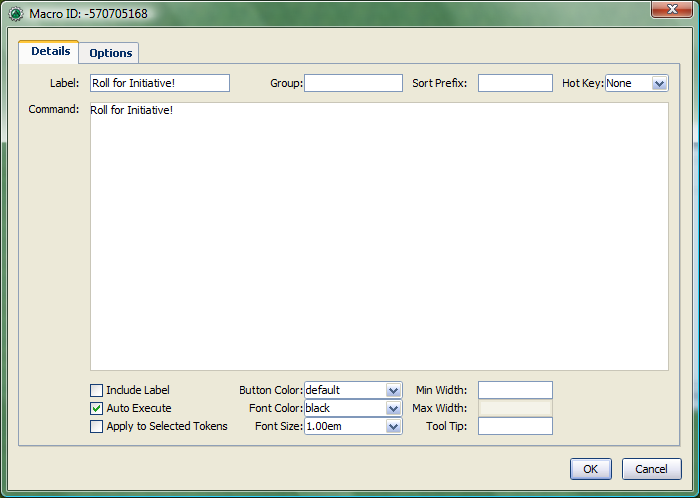
4. In the Label field, enter "Roll for Initiative!"
5. Leave the Group and Sort Prefix fields blank.
6. In the Command field, type
Roll for Initiative!
7. Click OK.
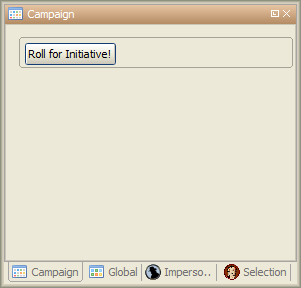
8. When you're done, you'll see that the button has changed - it now says Roll for Initiative! on it, and when you click it, lo and behold, the text "Roll for Initiative!" appears in the chat window.
That is macro writing at its most basic: you enter some text in the macro, and that text is read by the parser and sent to the chat window when you press the button.
Something More Interesting
"Roll for Initiative!" though scary when your GM utters it, is not all that interesting a macro. You probably thought "why wouldn't I just type that in chat?" And, in fact, the answer is "you probably would." So let's do something more interesting, and more in keeping with why we're using MapTool in the first place (after all, we're not here to write programs - we're here to play games): we're going to add some macro commands to the macro, in addition to just plain text. Macro commands are special instructions that, when read by the parser, tell it to do something more than just print text in the chat window, like roll some dice or calculate a value.
Macro commands must always be enclosed in square brackets (e.g, [macro command]) or curly braces (e.g., {macro command}). Enclosing them in this fashion is what clues the parser in that a command is coming - otherwise, it will treat the command just like any other text, and print it in chat.
Roll Some Dice
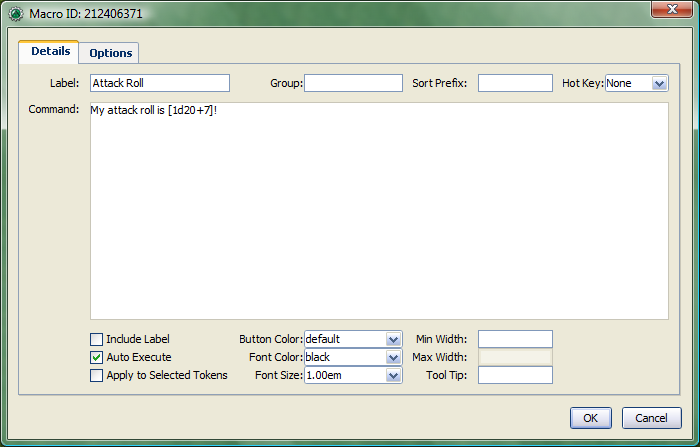
This is a simple macro that's going to automatically roll some dice, and add a number to that roll, before displaying the whole thing in the chat window.
1. Create a new macro (this can be created anywhere you like - on a token, in the campaign panel, or in the global panel), and open the edit dialog (remember, you do that by right-clicking on the button labeled (new)).
2. In the Label field, call the macro something like "Attack Roll" or "Dice Roll"
3. In the Command area, enter:
My attack roll is [1d20+7]!
4. Click OK. You should see a button labeled with whatever you chose in Step 2, above. When you click it, you'll see something like the following appear in chat:
Chris: My attack roll is 8!
What has happened is that MapTool read through the contents of the macro, and when it got to the section [1d20+7], it knew to:
- Roll a 20-sided die (or, in reality, choose a random number between 1 and 20), and
- Add 7 to that result, and
- Display the results in the chat window, inserted into the text in the right place.
You'll see that the number 8 has a gray background. If you hover over that number, a "tooltip" will pop up showing how that number was reached. In this case, I managed to roll a 1 on the 1d20 (bummer! a critical fumble!) If you don't see this tooltip, check your MapTool Preferences#Chat settings, specifically Use ToolTips for Inline Rolls.
Also, you probably won't see the name "Chris", unless your name happens to be Chris. That part of the chat output is just indicates who "said" that particular bit of text; if it was a token, it would have the token's picture and name instead of boring old "Chris."
More than Just Numbers
Macro commands can work with numbers and with text -- you can manipulate strings (that is, collections of alphanumeric characters) as well using the MapTool macro language. Say, for instance, you wanted to roll your attack, but wanted to enter the name of your target so that it showed up in chat.
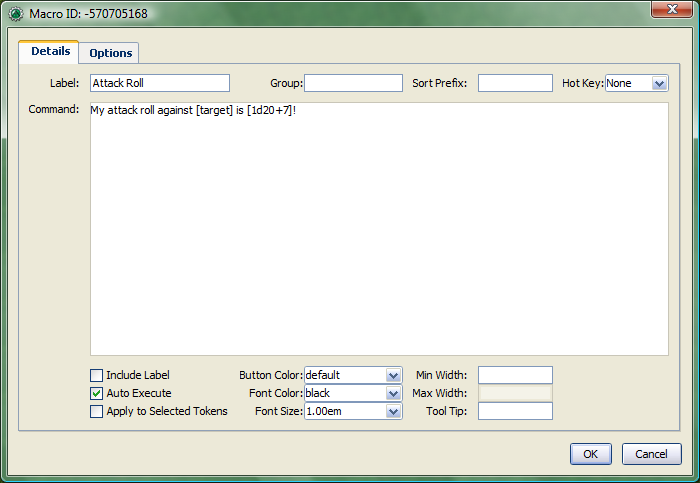
What you can do is edit your Attack Roll macro to look like this:
My attack roll against [target] is [1d20+7]!
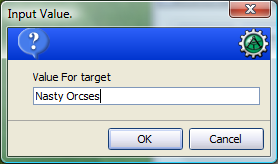
When you run this macro, though, suddenly a window pops up in your face demanding a "Value For target." What happened?
Well, when MapTool looked at that macro, it saw a macro command that just says [target]. MapTool assumes that any word inside a macro command that is not enclosed in quotes is actually the name of a variable (in other words, a value that might change).
MapTool also noted that nowhere in that macro do we say what the variable target happens to be equal to. Programming languages call this sort of situation an undeclared variable (in other words, you never declared what it equaled). Since MapTool has no way of knowing what target should be, it asks! If you type a name, number, or pretty much anything in that popup window, MapTool will take that information, assign it to the variable target, and finish the macro.
Go ahead and type "Nasty Orcses" (you can leave off the quotes) in the box, and hit OK. You should see in the chat window something like:
Chris: My attack roll against Nasty Orcses is 23!
Once again, the parser read through the text and macro commands you put inside the macro, and in the places where a macro command was indicated (by the square brackets, remember), MapTool substituted the appropriate information.
Using Variables in a Macro
We've seen in a couple of the examples some use of variables (like target in the example above) in a macro, but we haven't gone into the process too deeply yet. However, variables, and their use, is really the core of macro writing, so it would be remiss of me to leave it go.
What's a Variable?
If you're familiar with programming at all, you will know this already, but if you're just stepping into this stuff cold, the simple definition of a variable in terms of the macro language is:
- A variable is a value that might change (i.e., vary) based on a token property, a calculation, or another macro command
Since the value of a variable might change, we have to give it a name (which is called declaring the variable - you declare that "this variable exists!") in order to talk about it. Then, whenever we need to use whatever value the variable has at that time, we just put its name in the macro command, and MapTool will substitute the appropriate value at that time.
Think of it this way: if the value of a dice roll could be anything between 1 and 20, for example, you can't just enter 19 wherever you need to use that dice roll - it could be 19, or 2, or 7, or whatever. So instead, you'd want to say "whatever this dice roll is, put that number here."
- Note: that doesn't mean that MapTool will substitute the correct value for your needs; it means it will substitute the value corresponding to that variable at that time. So if your program has a mistake in it, the value might end up being wrong - but MapTool doesn't understand "wrong," it just understand "this is what it says right now."
Variable Assignments
When you want to give a variable a value, this is called "assigning" a value to the variable. The "assignment operator" in MapTool is the equals sign ( = ). That sounds fancy, but it just means that you use an equals sign to tell MapTool that a particular variable has a particular value. An example of a variable assignment is
[h:myHP = 30]
As you have probably figured out, what that line does is first declare a variable called myHP exists, and then assign it the value 30. That is variable assignment at its root - some variable equals some value. The h: with a colon tells maptools to "hide" the output. It's not necessary, but if you don't want all your variable numbers being sent to the chat window you should put an h: in front of your assignments.
You'll remember from the example where you were prompted for the name of a target that you can use a variable name without assigning a value to it. If you do that, you have declared that the variable exists, but no value is assigned, so MapTool asks you (or whoever runs that macro) for a value. The lesson learned is that a variable needs to have a value assigned to it for the macro to finish, but you don't always have to enter it ahead of time - sometimes you want to get input from the user.
Variable assignments are the only way to set or change the value of a variable; no variables are modified in-place. If you're using a function to change the value of a variable the function returns the content of the modified variable which must be assigned to the existing variable or a new variable.
When to Make an Assignment
MapTool processes each macro command in a macro in order, starting at the top. Therefore, unless you want MapTool to pop up a window asking for input from the user, you have to assign a value to a variable before you use it! For example, in the macro command:
The hit does [damage] [damageType] damage, leaving you with [remainingHP] hit points!
Unless you want MapTool to prompt the user for the variables damage, damageType, and remainingHP, you'll want to make sure to give them a value before you get to that line. Maybe something like:
[h:damage = 1d6+4]
[h:damageType = "fire"]
[h:remainingHP = 30 - damage]
The hit does [damage] [damageType] damage, leaving you with [remainingHP] hit points!
As you can see, we've made three variable assignments before the variables are used in the line about the hit. We've assigned the value of a dice roll of 1d6+4 to the variable damage, the value "fire" to the variable damageType, and the value of the operation 30 - damage to the variable remainingHP.
If you look carefully, you'll see that we've even used one variable in assigning a value to another variable: the value of the variable damage is used when we assign a value to remainingHP - so variables can be used to set and manipulate other variables.
Variable Rules
There are two rules to remember when making up variables:
- No spaces: variable names can't have spaces in them, so you can't use the variable
Hit Points- it has to beHitPoints. - Special Variables: there are several "special variables" that MapTool has reserved - which means you can't use them for other purposes than what MapTool already reserves them for. You can usually tell a special variable because it has a period in it's name, like
roll.countormacro.args. We'll get into those in another guide, but for now, just know that you can't create a variable with the same name as any of the variables on the Special Variables page.
Stepping Up Our Game
The examples above show very basic macro use: printing text to the chat window at the click of a button; making a simple dice roll inside a macro; and even getting some simple input from the user in order to complete a macro.
Now, let's step it up: we'll play with some formatting options, change token properties, and look at some basic looping (doing the same thing over and over again) and branching (doing different things based on some condition or situation).
Formatting Options
Macro output (like any chat output) can be formatted using basic HTML tags, as well as some options built into MapTool. We'll first look at the HTML briefly, and then at a couple of Display Roll Options.
Expanded Rolls
In MapTool 1.3.b54, the default way to output the result of a dice roll or calculation is just to print out the total or final value. So if you rolled 1d20+7, what will appear in chat is just the final result, with the tooltip (remember when you hovered your mouse over the number) showing the mathematical breakdown.
If you wish, you can instruct MapTool to print out the full math breakdown for a roll too, by using a Roll Formatting Option - specifically, the Expanded Roll.
Think of a formatting option as a switch telling MapTool how to treat the results of a roll. To get the expanded form, edit your attack roll macro to show:
My attack roll against [target] is [e:1d20+7]!
Then, when you run it, you'll get something like this in the chat:
My attack roll against Nasty Orcses is « 1d20+7 = 1 + 7 = 8 »
Now you can see the full breakdown of your roll.
Result-Only Rolls
But what if you don't want anyone to be able to see the breakdown? So far, both options still let everyone see the actual roll. For this, you use the Result Roll option. Edit your macro to look like this:
My attack roll against [target] is [r:1d20+7]!
And your output will look like this:
My attack roll against Nasty Orcses is 11!
Note that there's no gray background behind the number 11, and you can't get a tooltip if you hover over it. The Results Roll option strips out the special formatting, giving you just the plain text. If you wanted to get rid of the highlight behind the words "Nasty Orcses," you can just change the macro to:
My attack roll against [r:target] is [r:1d20+7]!
And the name of the target will be shown without any special highlighting.
Hidden Rolls
Sometimes, you don't want to see any output from the macro - maybe you just want it to show some text, and do the math in the background, without revealing everything. In those cases, you would replace the "r:" or "e:" in the above examples with an "h:", like in the example below:
[h:myHP = 30]
[h:Bloodied = myHP / 2]
My bloodied value is [Bloodied].
The example above is a very simple illustration of how the hidden roll is useful. In that macro, we're doing three things:
- Setting the value of the variable myHP to 30, but telling MapTool to hide this calculation,
- Setting the value of the variable Bloodied to the value of myHP divided by 2, but telling MapTool to hide this calculation too,
- Displaying some text, and inserting the value of Bloodied in at the end of the text output.
If you run this macro, the output will look like:
My bloodied value is 15
However, if you don't use the hidden roll option, the output would look like:
30 15 My bloodied value is 15
The extra numbers come from the two calculations before the line of text. You don't need to see those, so, conveniently, you can hide them!
HTML Formatting
MapTool macros support formatting using some basic HTML tags. Let's say you wanted to put the name of your target as one line, the attack roll you're making as another, and as a third line, you wanted to add a dice roll for damage. You might edit your Attack Roll macro to look like this:
I make an attack roll!<br>
<b>Target</b>: [r:target]<br>
<b>Attack</b>: [1d20+7]<br>
<b>Damage</b>: [1d8+5]
When you run that macro, your output in chat will look like:
I make an attack roll!
Target: Nasty Orcses
Attack: 15
Damage: 7
That's just simple formatting - you could put the output in a table, change the font and background colors, change its size...many options are available!
NOTE: If you're handy with HTML, be aware that MapTool supports HTML 3.2 - so things like the <br> tag should not be closed - it's <br>, not <br/>. Additionally, MapTool supports a subset of CSS 1 in the form of in-line styles, and also style sheets in certain instances. More information on the supported CSS tags can be found at Supported CSS Styles.
Using Token Properties
So far, we've manipulated some variables that are entered ahead of time, or that MapTool will ask for when you run a macro. We've got a formatted attack macro that lists a target, an attack, and a damage roll. However, we're still either hardcoding the values into the macro, or having the user put them in themselves every time they're needed. Since RPG characters are not all the same, we'll have to figure out a way to automate some of the numbers, so we can:
- Make one macro that many people or characters can use
- Minimize how much typing we have to do!
As discussed in the Introduction to Tokens, every token carries around with it a personal "character sheet" of sorts, in the form of the token's properties. These properties can be referenced by a macro - so you can, for instance, write a macro that says "Roll 1d20, and add my character's Dexterity to the roll." I'm sure you see how this might be useful.
Setting Some Sample Properties
Of course, for token properties to work, we've got to set them up. It's a good thing you read the Introduction to Properties and created a campaign file for the MapTool RPG Sample Ruleset!
The first step is to open up the MTRPG.cmpgn file (or whatever name you saved it as), and drag a token onto the map (if you don't already have one on there). If you've got no idea what that means, check out the Introduction to Mapping to learn about making maps and putting tokens on them. Now, follow these steps:
1. Double click on a token to open the Edit Token dialog.
2. Go to the tab marked Properties.
3. You'll see a spreadsheet-style list of all the properties in the token that you can edit directly (tokens have other properties that can be edited only with macros, but for now, let's not worry about them!). You should see (if you're using the MTRPG.cmpgn file we set up in Introduction to Properties):
*Strength:1
*Dexterity:1
*Intelligence:1
*Endurance:1
*HitPoints(HP):{Endurance * 6}
*Armor(AR)
*Movement(MV):{Dexterity}
4. Click in the cell next to Strength. A cursor will appear, showing that you can type in that cell. Enter a number in that cell as the token's Strength value. I'm going to use 6.
5. Repeat step 4 for Dexterity, Intelligence, and Endurance, choosing whatever number you like (I'm going to use 3, 2, and 6, respectively). Remember that HitPoints and Movement will be automatically calculated!
6. Click OK. You have just manually updated the token's properties. If you double-click on the token, and look at those properties again, you'll see that the numbers you entered are remembered.
You'll also see that now, when you hover your mouse over the token, a little popup appears in the lower left corner of the map, showing the values for the properties you've entered. This popup is called the Statsheet, and is a quick way to look at the token's properties - it's basically a convenient quick-reference "character sheet."
Referencing a Token Property in a Macro
Now that we've configured some token properties, let's use them in a macro. For our first macro, we're going to roll 1d20, and instead of adding 7, we're going to add the token's Strength.
1. Open up your Attack Roll macro.
2. In the lower left corner, make sure the box Apply to Selected Tokens is checked (otherwise, the macro won't know which token's Strength to use!)
3. Edit your macro to look like this:
I make an attack roll!<br>
<b>Target</b>: [r:target]<br>
<b>Attack</b>: [1d20+Strength]<br>
<b>Damage</b>: [1d8+5]
You'll note I replaced the 7 with the word "Strength." Since Strength is not in quotes, MapTool will know that you mean it to be a variable, and it will look on the current token (that is, the token that is selected) for a property called Strength. If it doesn't find it (or if the property has never been set), it will prompt you for it (just like you were prompted for the value of target). If it does find it, MapTool will put the value of Strength into the macro when it runs.
4. Select your token, and run the macro by clicking the button. The output will look something like:
I make an attack roll!
Target: Nasty Orcses
Attack: 27
Damage: 6
The important thing to note is that if you hover over the attack roll result, the tooltip will now say something like « 1d20 + Strength = 17 + 10 » indicating that the value being plugged in to the dice roll is the property Strength.
Changing a Property with a Macro
Token properties can also be changed using a macro. Suppose we want to reduce the token's hit points after an enemy hit the character. You can manually edit the token and change the value in the HP property, or you can create a macro that subtracts the amount of damage from the value of HP. Here's how:
1. Create a new macro on the Campaign panel.
2. In the Label field, enter "Damage".
3. In the Command field, enter:
Aarrgh! I'm hit! I have [HitPoints = HitPoints - damage] hit points left.
4. Check the box Apply to Selected Tokens (in the lower left corner).
5. Click OK. When you run the macro, you will be prompted for a value to put in the variable damage. I put in the number 7. The output will look something like this:
Aarrgh! I'm hit! I have 23 hit points left
And, if you double click on the token, you will see that the property HP is now 23. What this macro did was:
- Prompt the user for a value for damage (in this example, I entered 7)
- Retrieve the value of HitPoints from the token (in this example, the value is 30, because it is equal to Endurance * 6)
- Subtract the value of damage from the value of HitPoints (30 - 7, resulting in 23)
- Set the value of HitPoints (originally 30) to the newly calculated total (23)
- Output the text and the new value of HitPoints to chat
String Concatenation
An essential ability to master when writing macros is the ability to assemble strings - that is, collections of alphanumeric characters that are then manipulated or sent to chat. Frequently, you'll want to construct a string from some text that is always the same ("hardcoded" text) and text that can change (text that is the value of a variable, in other words). The construction of a string is often called "concatenation," but it just means "building a long string out of multiple short pieces."
There are two ways to do this in a macro - outside of a macro command, and inside of a macro command.
Outside of a Command
The basic way a macro works is this:
- The parser reads through the whole macro, and separates the macro commands from the plain text
- The parser diverts those macro commands to the appropriate places to be processed (so, numbers are added up, dice are rolled, etc.)
- The processed commands are sent back to the parser, which substitutes the results of those commands in the place where each command was.
- The whole mess - plain text, and the results of the commands (now sitting in place of the actual commands) is sent to the chat window.
So, when you want to display the result of a command along with some text (for instance, you want to print the word "Attack:" and then next to it print the result of a 1d20 roll) in a macro, the easiest way is to just insert a command in the right place in your text, like so:
Attack: [1d20]
The parser will read that whole thing, send off the command [1d20] to be processed, and when it gets that result back, plug it in in place of the command, and send it off to chat. The result will be something like "Attack: 17."
That's the most straightforward way to send text to chat - just put the variables you want displayed in the right place in the text, and they will be shown in the chat window.
Inside of a Macro Command
Sometimes, though, you need to use strings inside of the square brackets. In that case, putting them together is a little different. First of all, within square brackets, you need to use single or double quotes to surround something you want to be treated as a string. Otherwise, MapTool will think you want each word to be a variable! For example:
Correct String
[string = "This is a string"]
Incorrect String
[string = This is a string]
Remember - outside of square brackets, no need for quotes. Inside? QUOTES.
So what if we need to build up a string dynamically? That is, what if we need to make a string that is partly "hardcoded," and partly based on user input? You can't guess what the user is going to say, so you can't write that part ahead of time. What you can do is concatenate the user input into your hardcoded string. The way to do that is to use the plus sign (+), which - when it's used with strings - will piece them together into a long string.
Here's an example: suppose we want the user to enter the name of a skill, and we then want to put that skill name into an existing, hardcoded string, which will be stored in another variable. You would do that like this:
[h:existingString = "The skill name you entered is "]
[h:concatString = existingString+skill+"."]
[r:concatString]
What happens here is this:
- Line 1 sets the "hardcoded" portion of the output
- Line 2 sets the concatenated string -
concatStringto equal the value ofexistingStringplus the value ofskill(which MapTool will prompt for). However, in this case, since MapTool knows thatexistingStringis a string, it will not try to add them mathematically, but just append the value ofskillafter the value ofexistingString. To be grammatically correct, we concatenate another little string on the end, this time, the period. Remember - strings inside square brackets need to be in quotes (but variable names, of course, do not!) - Line 3 displays the final value of
concatString, afterskillhas been appended to it. The output will look something like:
The skill name you entered is Archery.
That's a very simple example, but it illustrates the essence of constructing strings - you "add" them together with a plus sign.
Where do We Go From Here?
This guide barely brushes the surface of the full potential of the macro language in MapTool. However, using just the basic techniques shown here, you can create a lot of very handy, convenient macros to make playing your game easier and more fun. In future guides, I'll cover more advanced macro commands and techniques.