Introduction to Vision Blocking
BEGINNER
THIS IS A BEGINNER ARTICLE
Vision Blocking
In MapTool, tokens can be given sight, which lets the program model vision and lighting in-game. In other words, when you configure the token with vision, it can then "see" other tokens and areas of the map. In addition, MapTool provides for lighting - so a token can "see" only to the extent of its light source (or nearby light sources) - and Vision Blocking, which lets you establish boundaries to the token's visual range (so you can indicate where the walls are in a dungeon, for instance).
This introductory element will briefly review the Vision Blocking Layer tools in MapTool (sometimes also called topology tools), and how to use them to create a sample dungeon environment. Remember, Vision Blocking is intimately connected to the Sight, Light, and Fog of War features of MapTool, so once you've read this tutorial, go check out the Introduction to Lights and Sights and see how it all works together!
- Not covered in this article is Token VBL.
First, Get a Map

To start off, we'll need a map of a dungeon. Somewhere suitably subterranean and dank, full of twisty little passages, all alike.
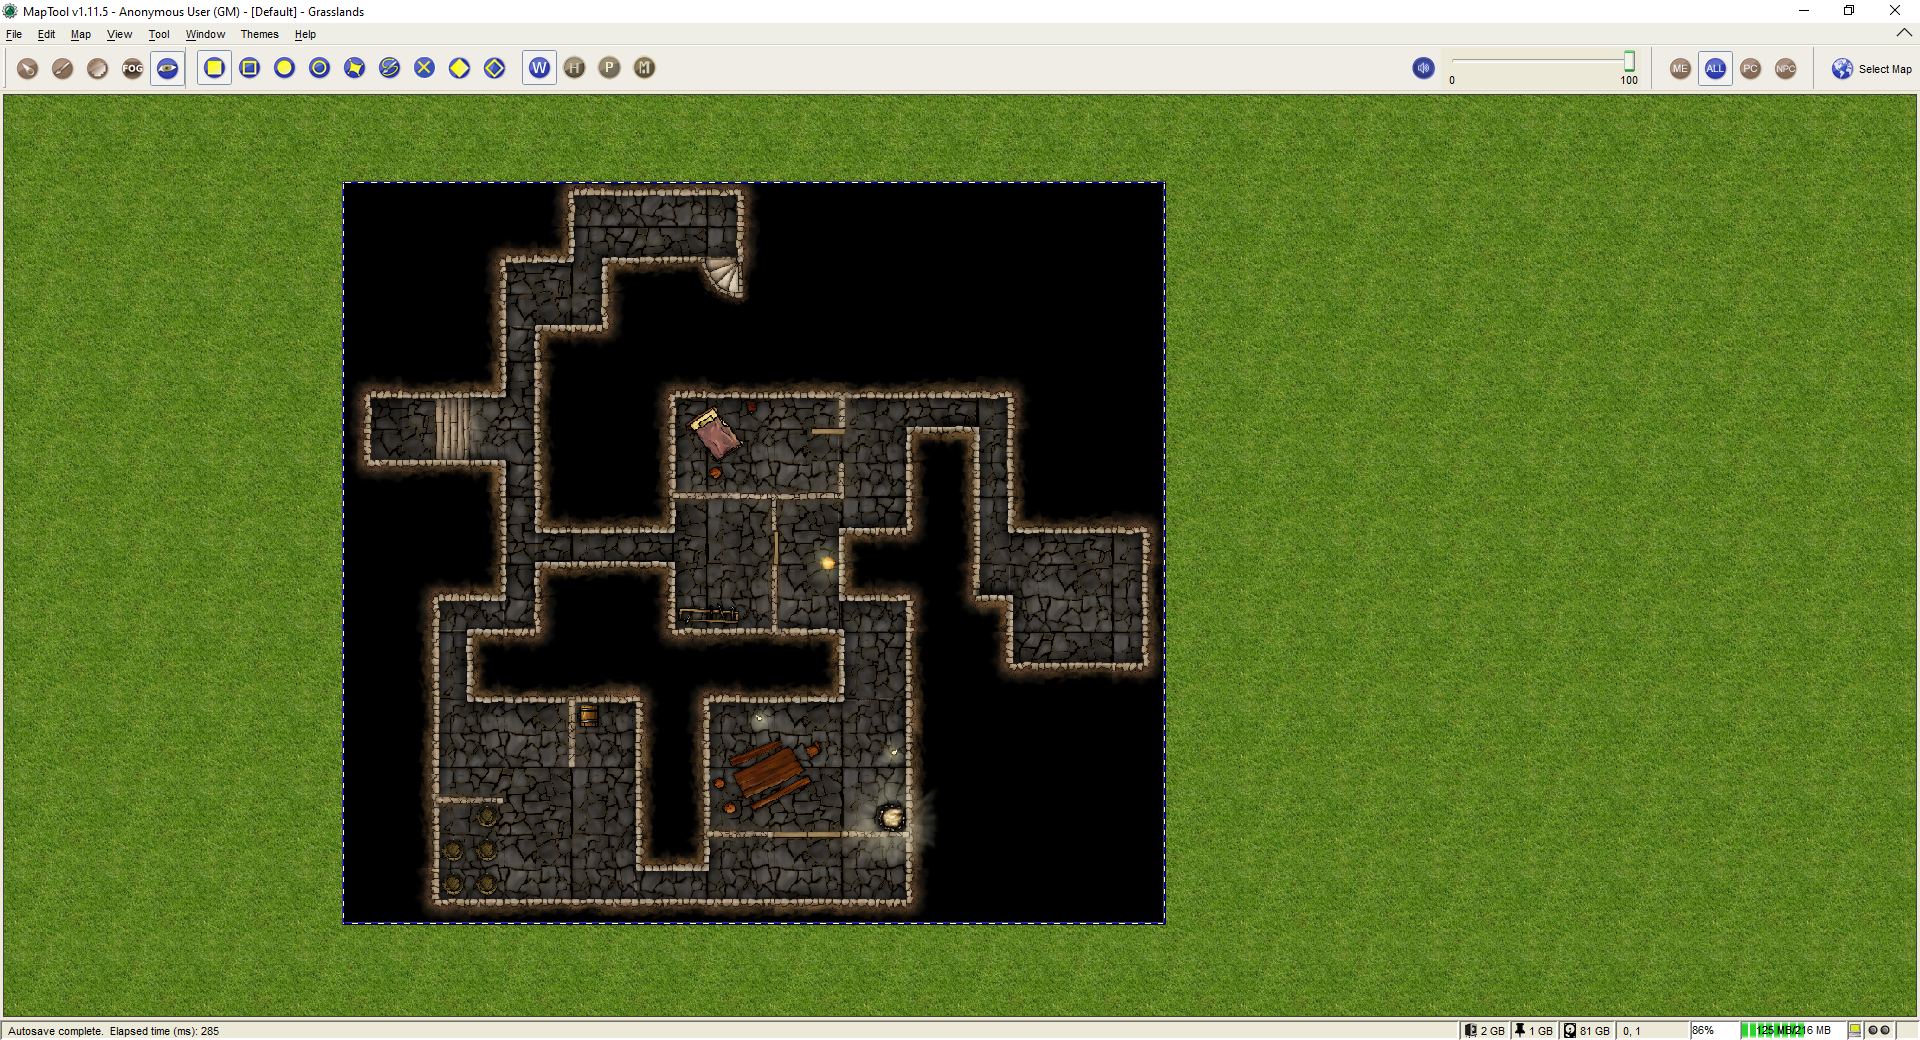
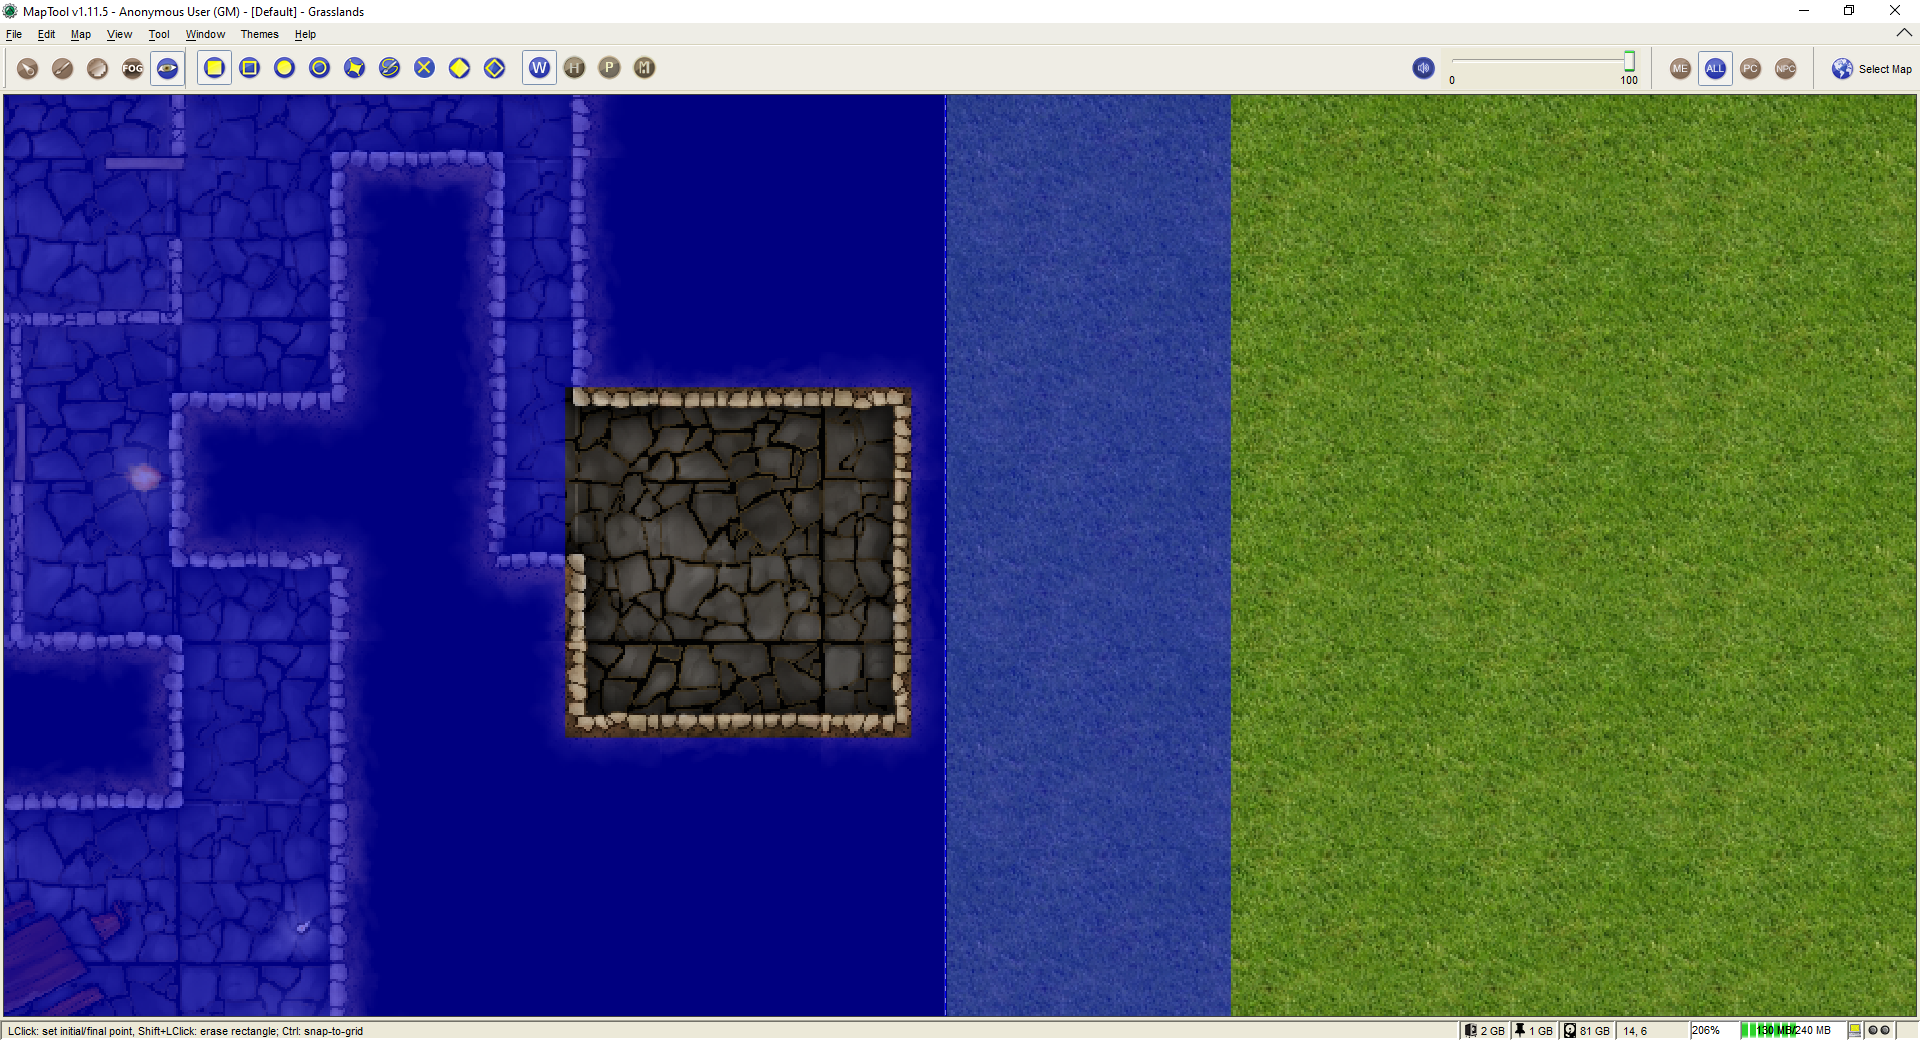
Well, maybe we won't get too crazy with the mazes of twisty passages. Created using an awesome tileset from the Resource Library by Jonathan Roberts (Torstan on the RPTools Forums), the map shown to the right will be used for the examples in this introductory tutorial.
Activating the Vision Blocking Tools


To activate the Vision Blocking Tools, click on the "Eye" icon in the MapTool toolbar (see the eye icon screenshot). When you do so, two new sets of buttons will appear - these are the various Vision Blocking drawing tools you can use. If you hover over them, a tooltip will pop up explaining what each one does. From left to right, they are:
The first set - the drawing tools:
- Draw a rectangular VBL: this creates solid rectangular areas that block vision (these are generally called Vision Blocking Layers, or "VBL" for short). Tokens outside the area cannot see into it or through it; tokens inside the area cannot see anything at all (it is solid and opaque).
- Draw a hollow rectangular VBL: this, as it implies, creates hollow VBL - if a token is inside the area, they will see everything inside it, but will not be able to see beyond the boundary; for tokens outside the VBL area, they will see everything outside, but cannot see into the rectangular area.
- Draw a oval VBL: like the rectangular one, this creates a circular VBL (in reality, a polygon approximating a circular area; actual circular curves are performance-intensive!).
- Draw a hollow oval VBL: behaves like the hollow rectangle, but for ovals.
- Draw closed polygon VBL: this lets you draw an arbitrary polygonal shape using line segments, and when finished, closes it and makes a solid VBL out of it. To start the polyline shape, left-click on the map, and draw the first segment. To attach the next segment, right-click and move the mouse to create the next line segment. When finished with the full shape, left-click to close it.
- Draw poly line VBL: as above, but creates a hollow polygon.
- Draw a cross VBL: this option draws a VBL consisting of two perpendicular lines in the shape of an "X".
- Draw a rectangular VBL: another option to draw a rectangular VBL, this time rotated by 45° (Sort of a diamond shape).
- Draw a hollow rectangular VBL: as above, but again hollow.
The second set - the VBL and MBL types:
- Draw a wall VBL: this VBL will be opaque.
- Draw a hill VBL: this VBL will simulate the effect of an increased elevation level. Works only with the solid drawing tools.
- Draw a pit VBL: this VBL will simulate the effect of an decreased elevation level. Works only with the solid drawing tools.
- Draw cover VBL: this VBL will simulate the effect of shrubbery, fog, or other concealing effects. Works only with the solid drawing tools.
- Draw a MBL: Movement Blocking Layer - this option does not affect vision, but the calculation for the path a token would take. Therefore this article does not cover MBLs, see AI_Pathfinding for further information.
In order to draw any VBL objects, you need to select one tool of the first set and one or more options of the second set, but be advised not all of the possible combinations of VBL types make sense in a normal gaming setup. The wall VBL blocks any vision on its border and inside its area and therefore overrides the more sophisticated options of pit and hill VBLs. You can combine it with an MBL.
A pit VBL simulates an area that is below the main elevation of the map. Tokens outside of the area marked by the pit VBL have vision in the area and beyond, but tokens within the marked area only have vision within its confines. (Not a perfect simulation, as even tokens far back from the edge of the pit can still see inside, and tokens inside the pit cannot see others standing right on the edge.)
A hill VBL simulates an area that is above the main elevation of the map. Tokens outside of the area marked by the hill VBL have vision into the area but not beyond. Tokens within the area have vision in the area and beyond.
If you combine the hill and pit VBLs, you get a VBL that allows tokens from the outside to have vision into the VBL, but not beyond. Tokens within the VBL area have only vision within its confines.
Cover VBL simulates an area that can be seen out of, and within, but tokens outside the area cannot see into it.
The concept of pit, hill, and cover VBLs demands that you select one of the solid, ie. non-hollow, area drawing tools: either of the rectangular ones, oval, and closed polygon.
Best Practices
Vision blocking and vision processing is processor-intensive, and overuse of (or overly-complex) VBL can cause serious performance issues with MapTool - slowdowns, inability to navigate a map, and so forth. Some rules of thumb:
- Use square VBL wherever possible - and minimize the use of circular or highly irregular VBL. (In other words, don't try to trace every nook and cranny in a cave wall!)
- Use solid VBL wherever possible - this prevents gaps between poly lines which can be performance hogs. Instead, cover the map with VBL, and cut out the areas that the tokens should be able to see.
- Use as little VBL as necessary to get the effect you seek - make it efficient!
- It is frequently a good idea to set up a vision boundary at the edges of the play area on your map. Maps in MapTool are infinitely sized, but if your tokens are going to be only in the dungeon area, there's no reason for MapTool to have to be calculating what they see all the way out to the edge of the universe!
- Setting the Vision Distance in the Map settings to less than the size of the map will also help.
These will help keep performance from bogging down. You can use the other kinds of VBL, but simply be aware of how complex your vision blocking setup is getting.
Putting VBL on the Sample Map
Now, to add some vision blocking to the map. We will use a recommended technique, which is to cover the entire map with a solid block of VBL, and then "cut out" of that block the areas that the players will see.
- For an alternative method using Token VBL, check out the Adding VBL with a Mask tutorial.
Cover the Entire Dungeon with Solid VBL
- Zoom the map so you can see the whole thing.
- Select the Draw a Rectangular VBL and the Draw Wall VBL buttons.
- Left-Click to place the upper-left corner of the solid VBL. Do not hold down the left-mouse button.
- Move the mouse to define the size of the VBL. You'll see it traced out in a transparent red color as you move.
- Left-Click again to place the lower-right corner of the VBL. The VBL will turn blue (if you go to the toolbar and select one of the other tools on the left side - switching off the VBL tools - the blue VBL indicators will disappear. They are only visible when the VBL tools are active).
You've now covered the entire map with VBL. If a token was placed outside that area, and had a "sight" setting active, it would not be able to see into that area.
-
Zooming out so the entire dungeon area is visible -
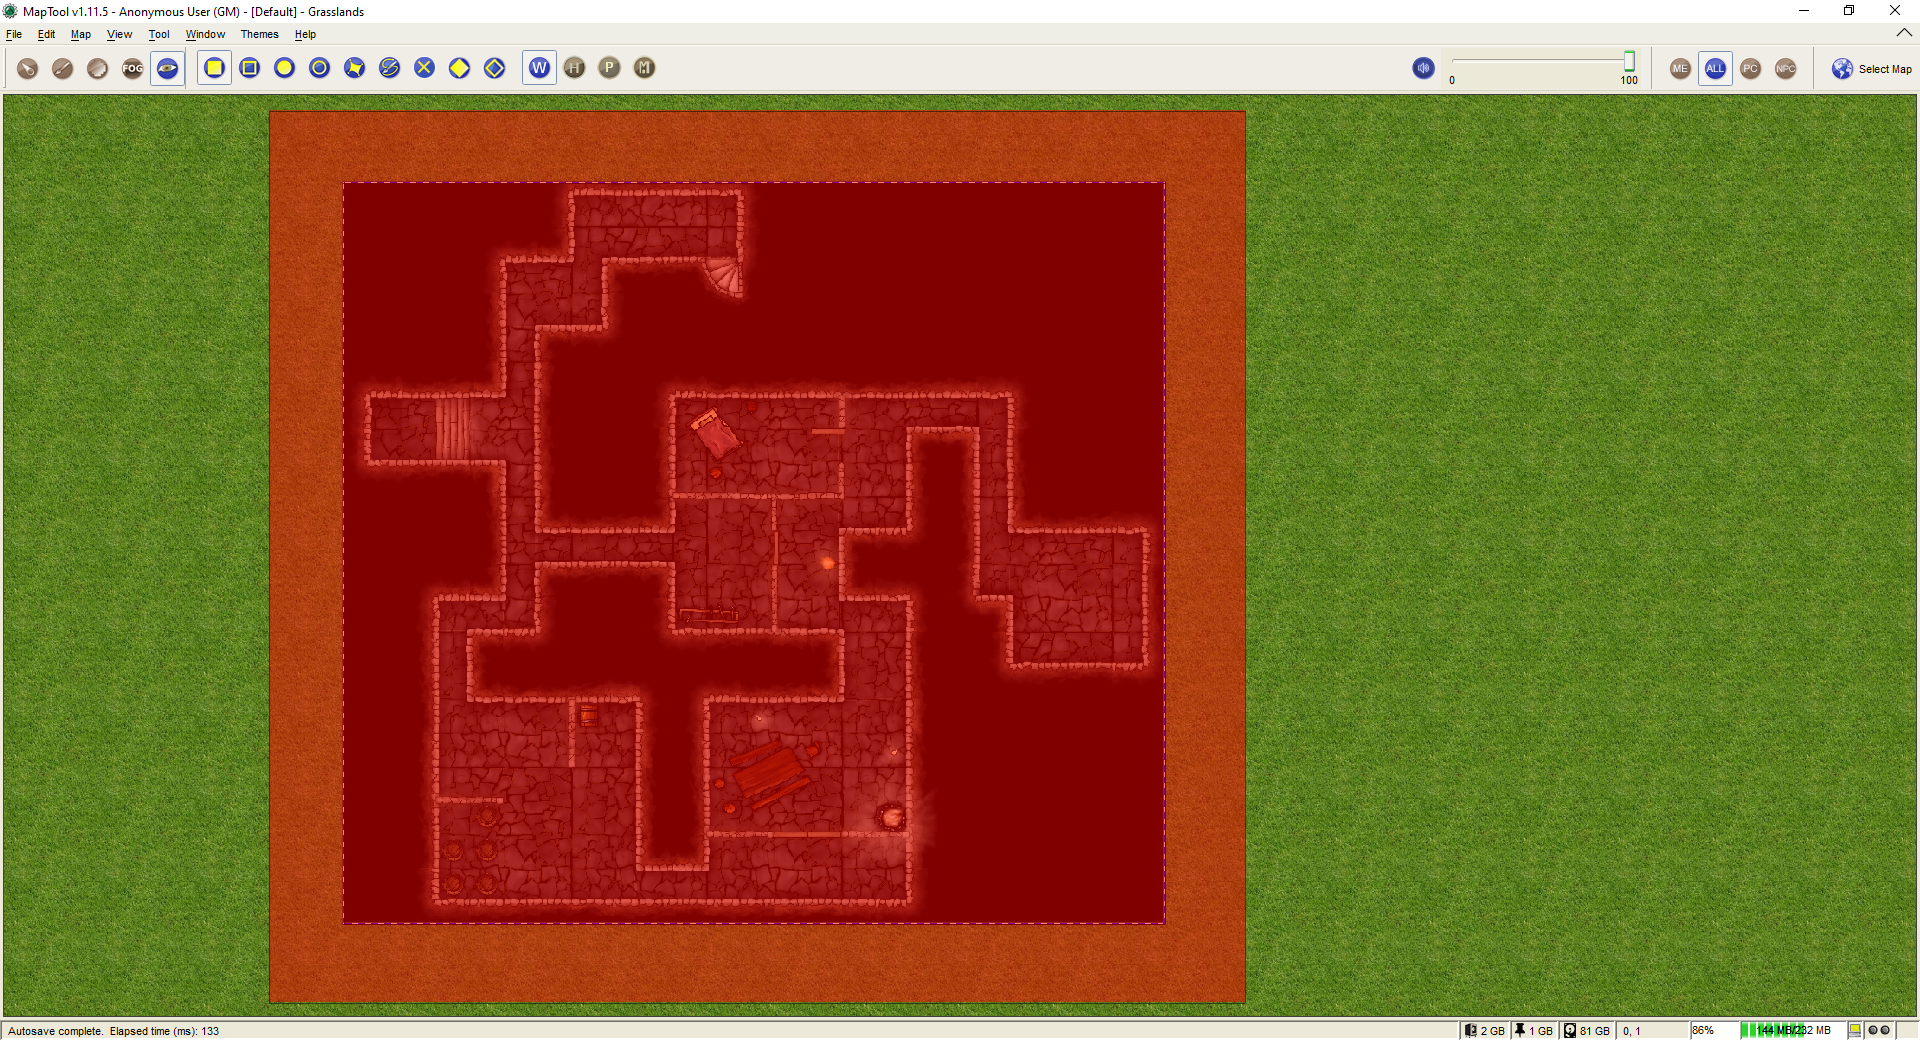
Creating a block of solid VBL over the whole dungeon -
The entire dungeon area covered by solid VBL


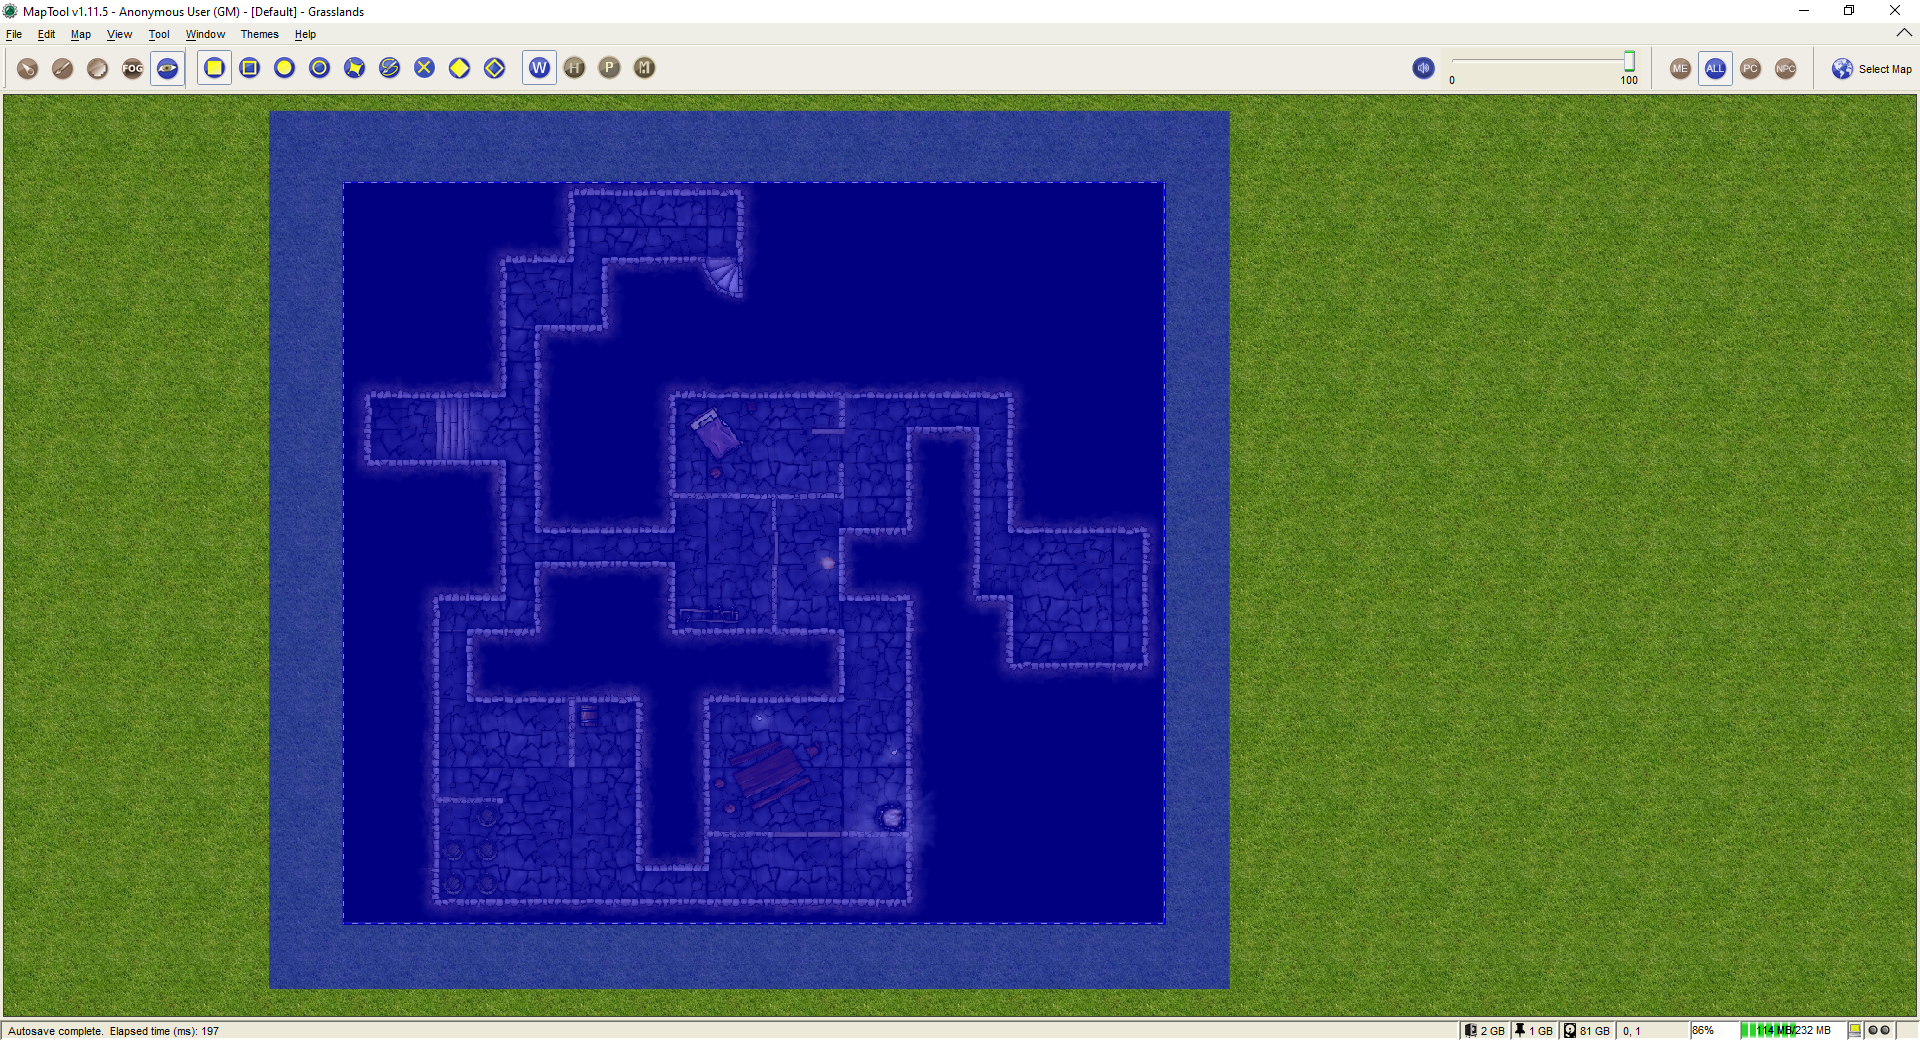
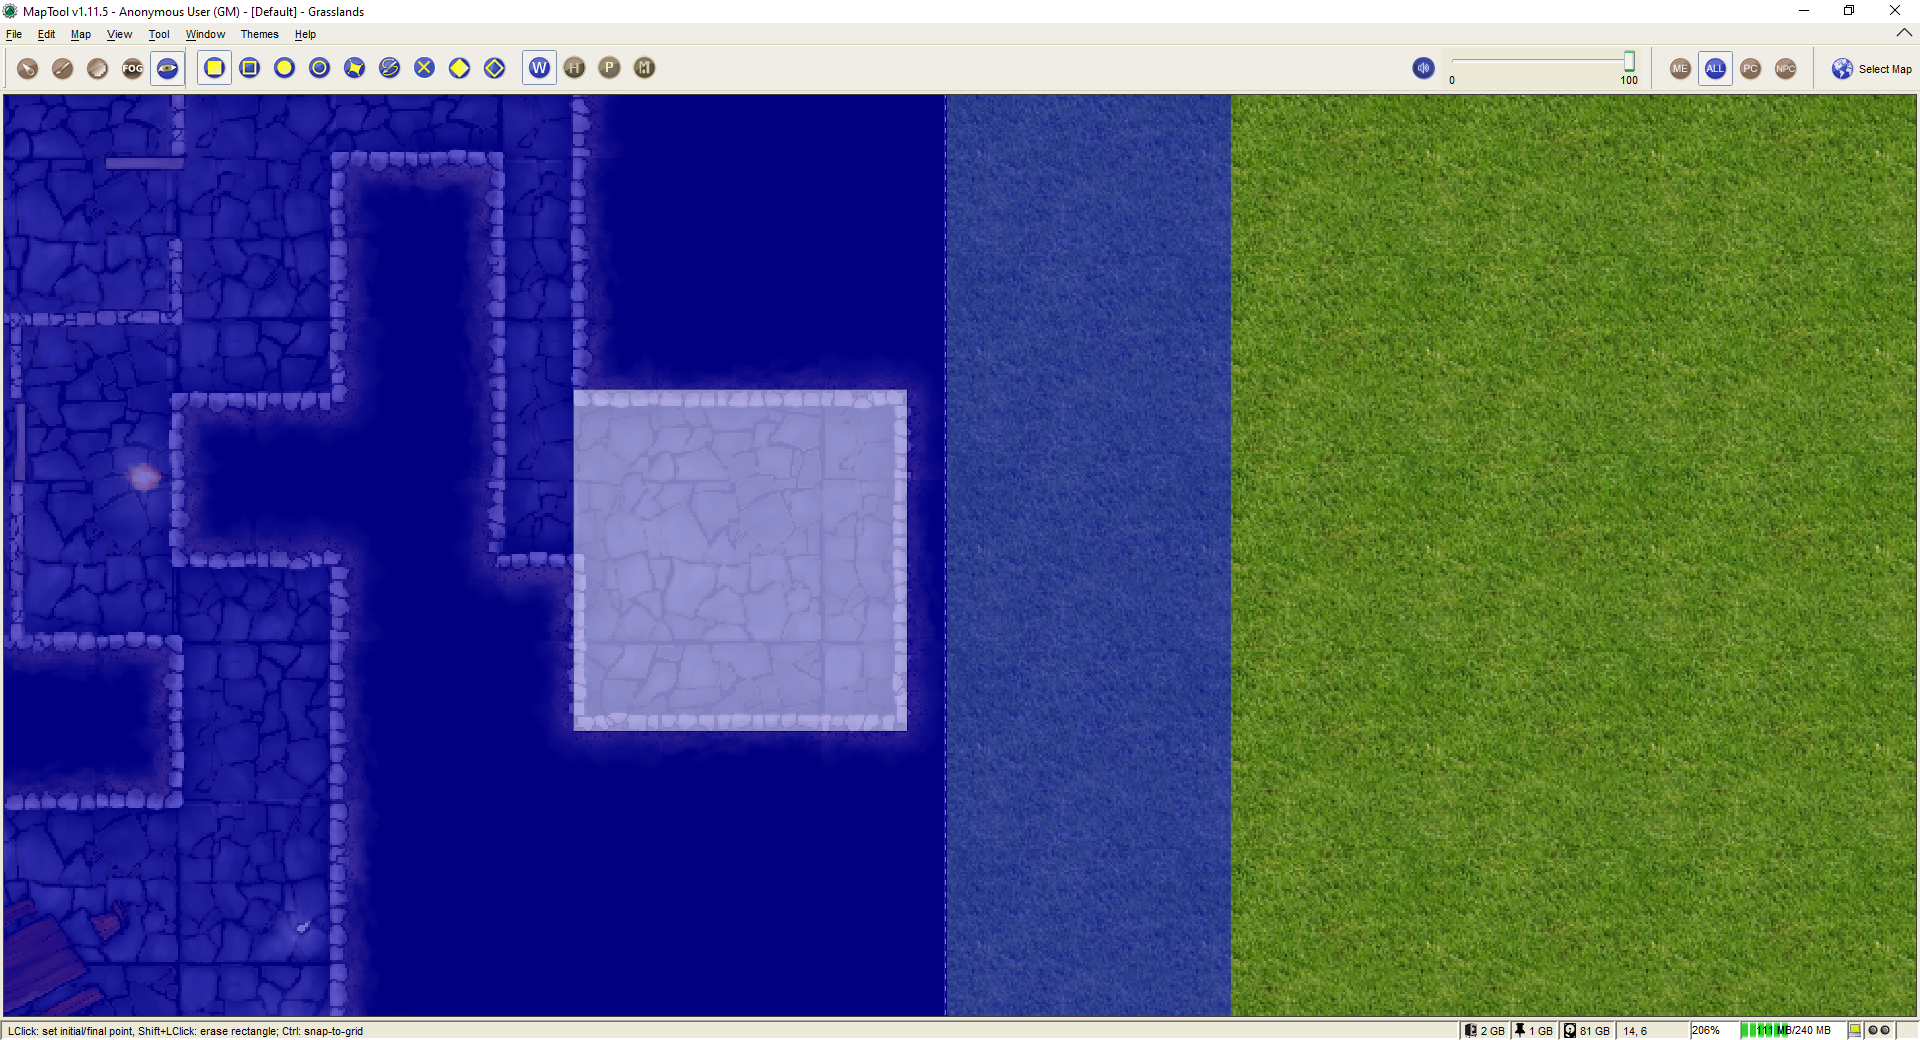
Cut out the Visible Areas from the Solid VBL
Now, we cut out the rooms. This process is a bit trickier: to keep the VBL efficient, make sure you get the edges lined up as best you can (holding down Ctrl to force snap-to-grid is helpful) and you don't leave any narrow gaps or thin lines of VBL between rooms (a trick to doing this is in the instructions below). For this part, I will be clearing all VBL out to the outer walls. We will work on the interior walls later.
- Zoom the map until you are comfortable with the zoom level.
- Select the Draw a Rectangular VBL and the Draw Wall VBL buttons.
- Hold down the Shift key, and left-click to mark the upper-left corner of the area of VBL you want to erase. A white, transparent box will follow the mouse cursor (if it's not white, you forgot to hold Shift! Go ahead and hold it now and the box will change to white).
- Move the mouse until you've reached where you want the lower-right corner of the cleared area to be, and left-click. The blue VBL will disappear. You have now erased the VBL for that area, and tokens in that area will be able to see (their vision would be blocked, of course, once it reached any VBL!).
- Repeat this process for the rest of the rooms, tunnels, and so forth.
Afterwards, you'll have a large blue area, with the dungeon "cut out" inside it.
TIP: if you hold down Ctrl while you trace your VBL, it will snap to the grid lines of the map. This is very useful for aligning VBL. I used this technique to erase the VBL on the sample map, because it makes the VBL align easily and squarely on the dungeon walls.
Advanced TIP: you can adjust the grid so that it aligns with the walls of your dungeon, but any tokens you've placed may shift their position - don't panic! Just ignore that and finish your VBL editing; when you adjust your grid back, any tokens that moved will move back to where they were. It's probably a good idea to save your campaign before doing this, as many people change their grid but don't remember what the original values were to change it back!
-
Erasing a section of VBL - hold down Ctrl to make the area snap to the map grid. -
The VBL is now erased over the dungeon rooms themselves.


Interior VBL
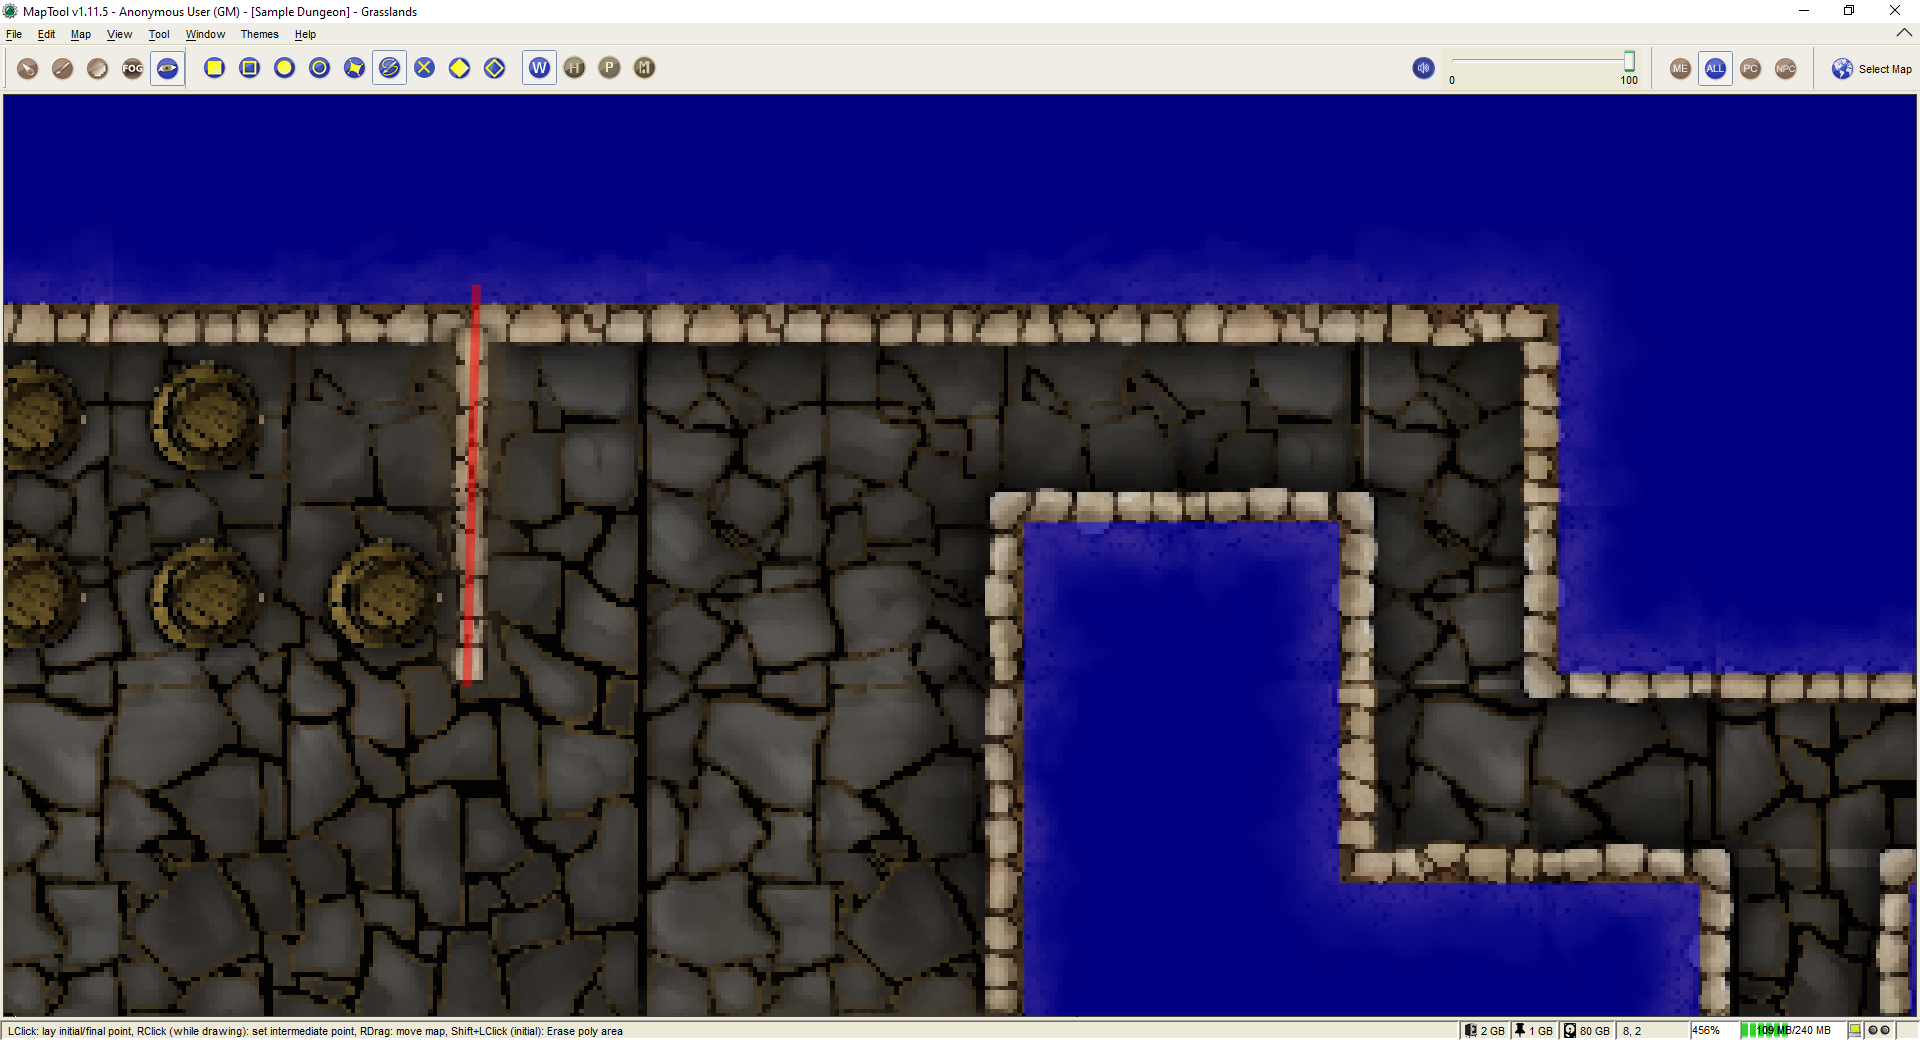
Finally, we will put VBL on the interior walls. This will make it so that the walls inside the dungeon block vision too.
- Zoom the map to focus on a particular wall.
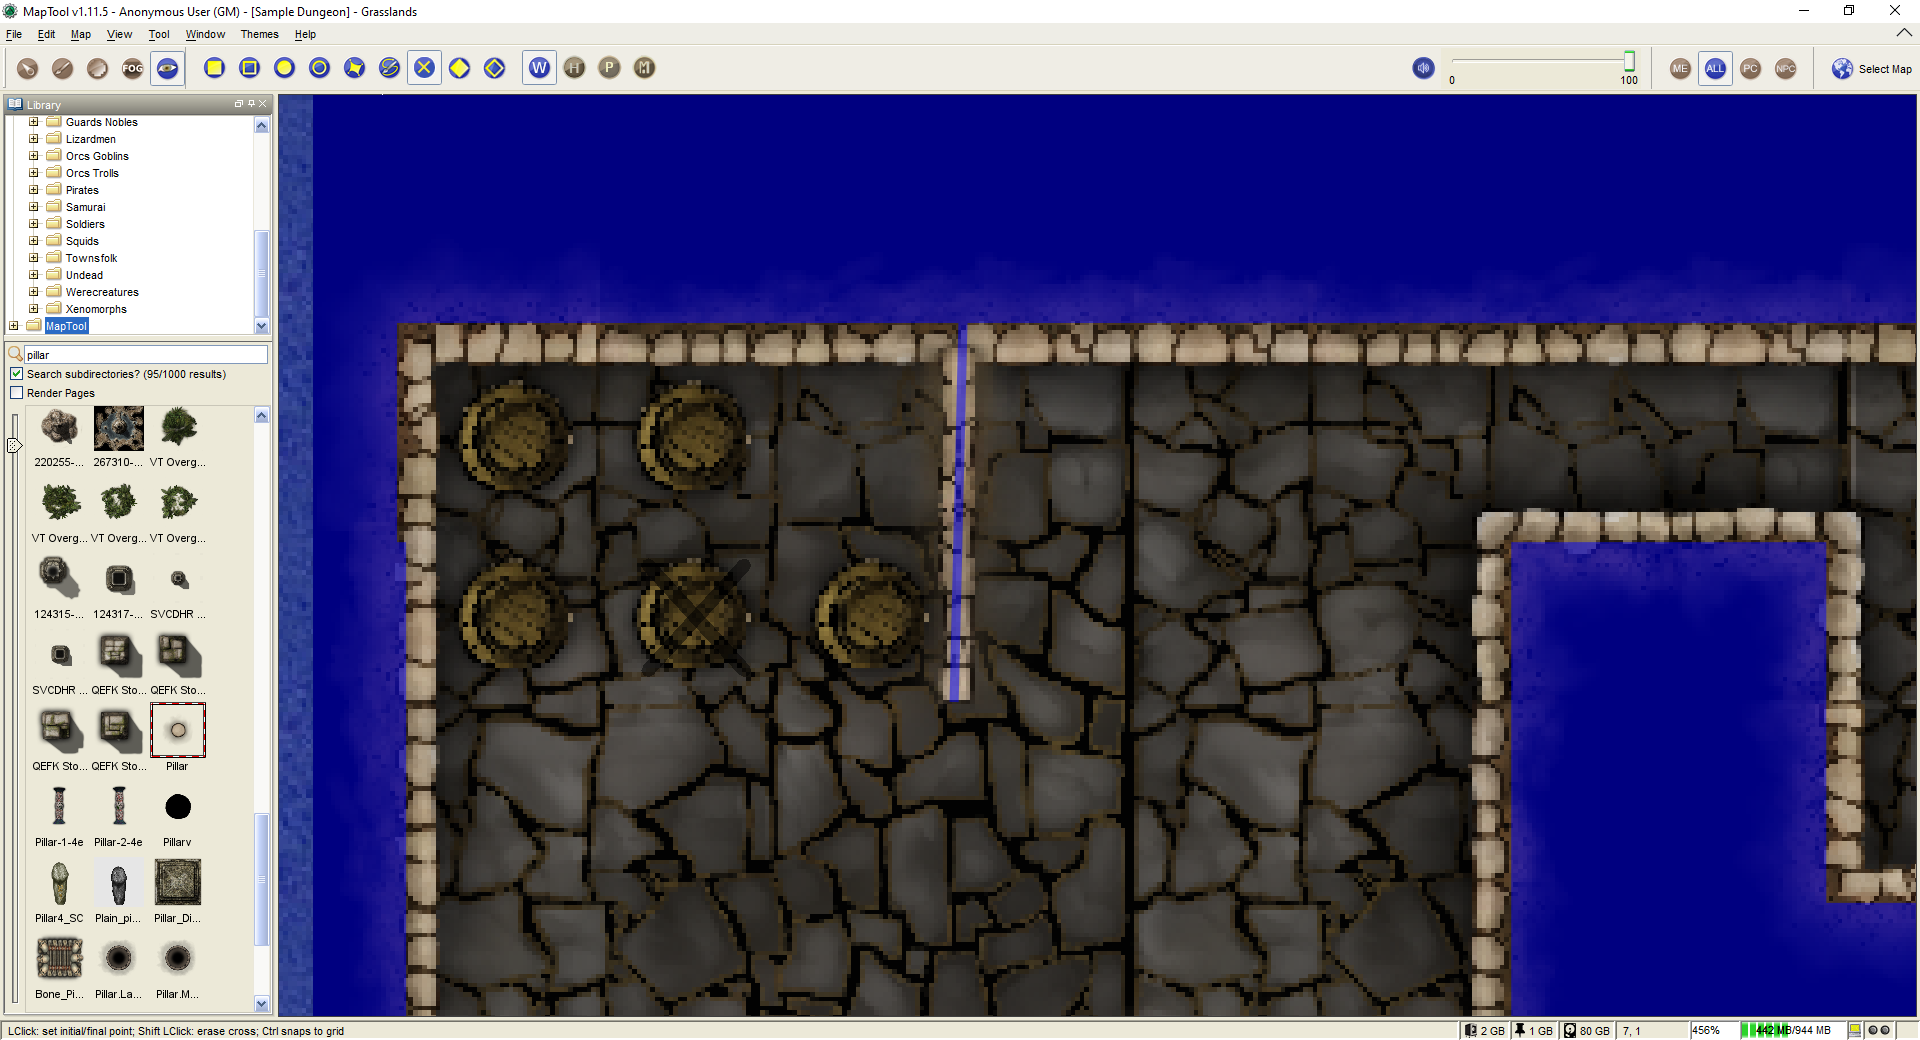
- Select the Draw poly line VBL and the Draw Wall VBL buttons.
- Hold down Ctrl to force snap-to-grid, and left-click on the map to place the beginning of the line segment. I recommend starting the line somewhere in the solid VBL, so that there are no gaps at the edges of the walls.
- Move the mouse to draw the line segment. (In the screenshot, the line segment is the thin red line inside the yellow circle; the yellow circle was drawn on the screenshot to show you where the polyline is - it's not part of the VBL process.)
- Still holding down Ctrl, left-click to place the end of the line segment. The red line will turn blue, indicating that there is VBL now on that wall.
- Repeat the process for the other walls, until you are satisfied.
It's not necessary to hold down Ctrl, but using snap-to-grid can significantly speed up this process.
-
Drawing VBL on the walls with the Poly Line VBL tool. -
Drawn VBL on the walls with the Poly Line VBL tool.


VBL and Objects
There are lots of objects in a dungeon that can block vision - doors, pillars, piles of rubble, chests... you name it. It is also possible to apply VBL directly to these objects using Token VBL. This means that you can, for instance, put VBL on a door and have it "open" with the door when your players open it.
If you don't want to configure Token VBL, for instance if your map image has doors directly on it but you haven't made them into tokens, you can also simulate door VBL by deleting the VBL that crossed the doorway. You'll have to experiment with the VBL for the objects in your dungeon, but here are some tips (these are apart from using Token VBL, which is an advanced topic):
- Doors: for doors, if they are closed, simply draw the VBL along the wall in which the door sits. When the door is opened, you can rotate the door object (if you have one), and use Solid Rectangular VBL to erase the vision blocking layer that covered the doorway (remember, hold down Shift to erase VBL). Make sure to use solid VBL - if you use a hollow rectangle, it will only erase where the hollow rectangle's boundary intersects the other VBL.
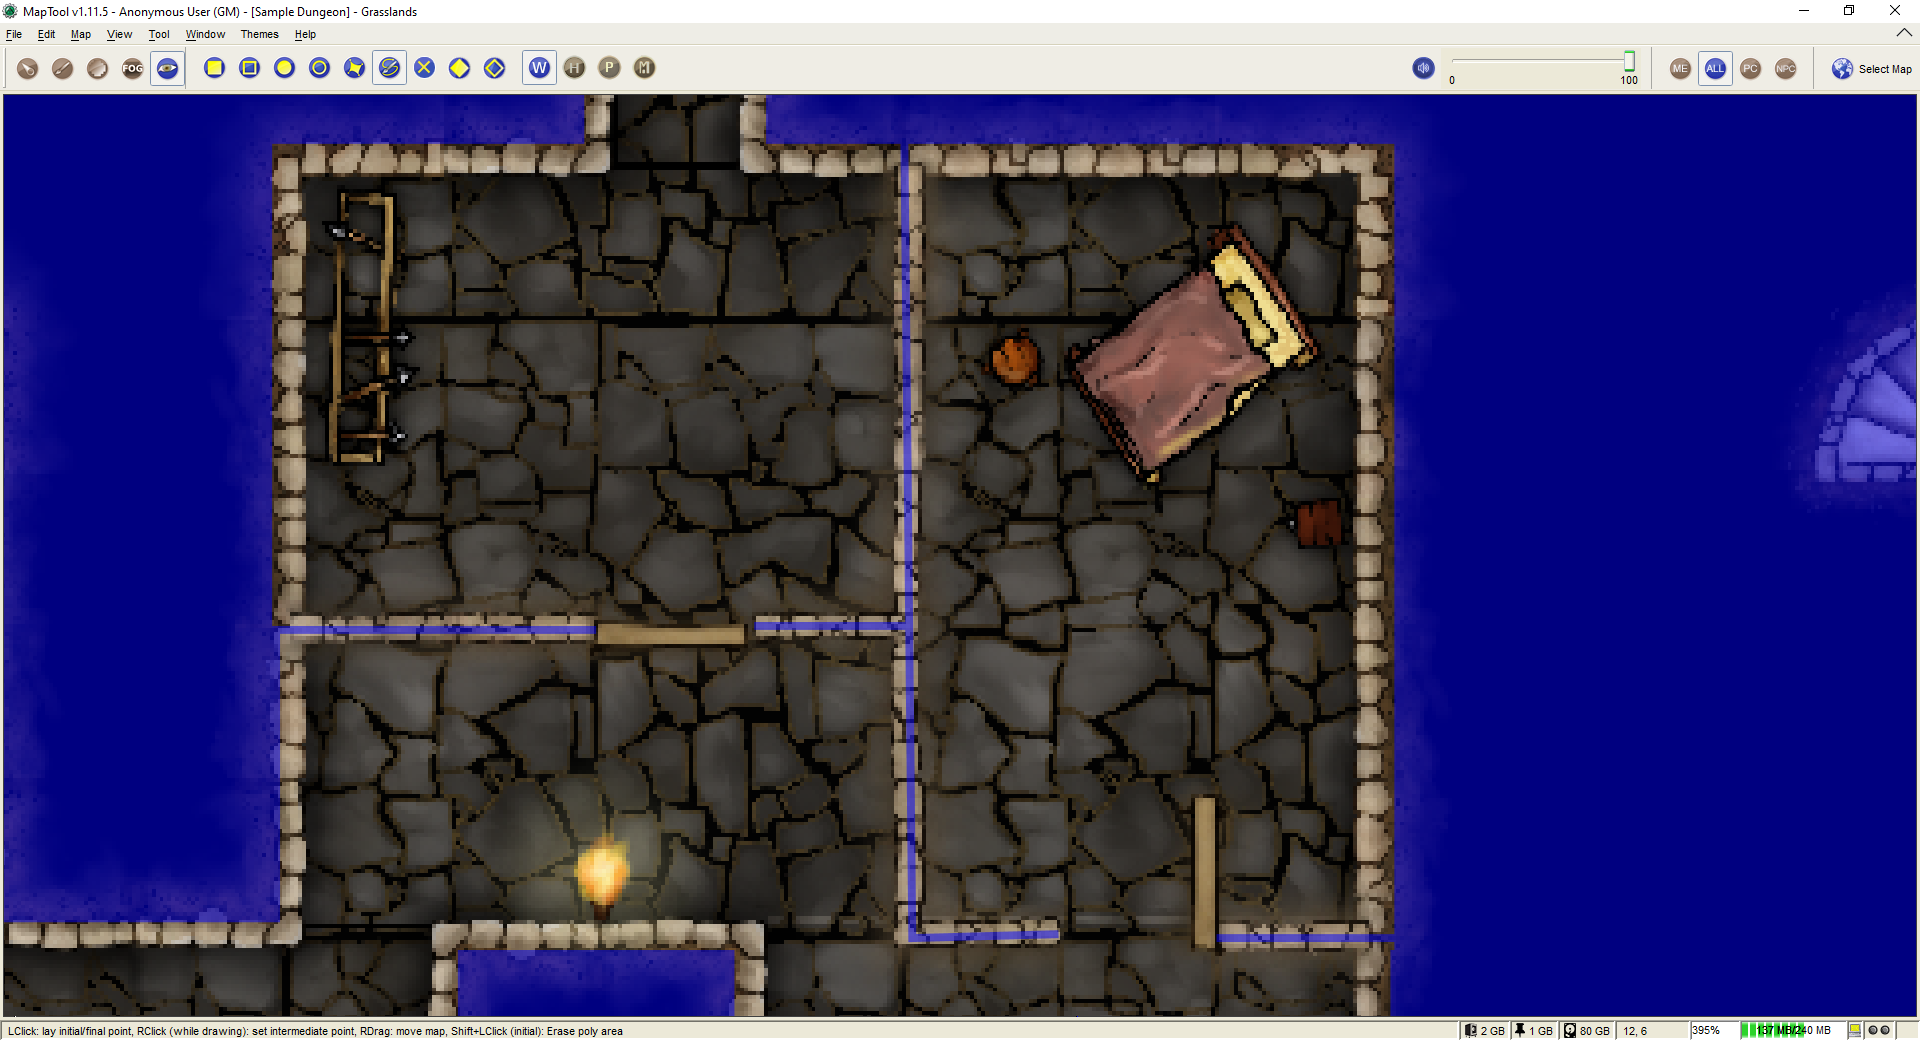
- Pillars, statues, and standing objects: remember that, when you use VBL, the tokens cannot see into or through it at all (and, because of this, the players won't see anything covered by or hidden inside VBL on their screens). If you want the players to be able to see some of an object - like a large pillar - one of the recommended tricks is to draw an "X" on the pillar (instead of covering the whole pillar with a circular or rectangular solid VBL). For your convenience use the Draw a cross VBL tool in combination with the Draw Wall VBL. Using an "X" means that the players can see some of the pillar, depending on where their tokens are. It makes for a much nicer look. If you look at the screenshot, you'll see an "X" drawn using VBL on top of one of the barrels.
-
Drawing VBL on a barrel with the cross VBL tool. -

Drawn cross VBL on a barrel with the cross VBL tool


VBL Limitations
The Vision Blocking Layer in MapTool is a tool for helping to simulate what a character can see during a game. However, it does have limitations, and doesn't "completely simulate vision" or anything like that. We touched on one limitation earlier (the door VBL example). Here are a few other limitations of the current (as of MapTool 1.11.5) Vision Blocking Tools.
- Vision Blocking is Binary: VBL in MapTool is on or off. There is no "partially transparent" or "one way" VBL in the current version of MapTool. (Although the Hill and Pit VBLs might be considered "one way" up to a point.). It may be possible to get a one way effect as desired with Cover VBLs inside-out but not outside-in vision.
- Vision Blocking is Total: Related to the above, VBL blocks all forms of vision. There are no vision types currently that can see through VBL.
- Vision Blocking has no Elevation: VBL cannot at this point be given a particular height - it stretches to infinity, up and down, and so there's no way to set up VBL so a tall character can see "over" it. The Draw hill VBL and Draw pit VBL modes mitigate this limitation for some use cases. Also see the documentation of the Lib:elevation framework here in this wiki.
- Editing VBLs: There is no such thing as a VBL Explorer (in comparison to the Draw Explorer or Map Explorer). VBLs get added, modified and removed solely via the tools described above. Especially, if several different types of VBL are used in combination, it can be difficult to identify which ones are actually used. The indicator of the combination is the color of the VBL, but unfortunately the individual colors are not very distinct.
In order to see, without leaving the VBL editing mode, which modes are used for a individual VBL, the best way is to choose one mode and try to erase it. If the color changes, that mode was present, and it can easily be redrawn.
-
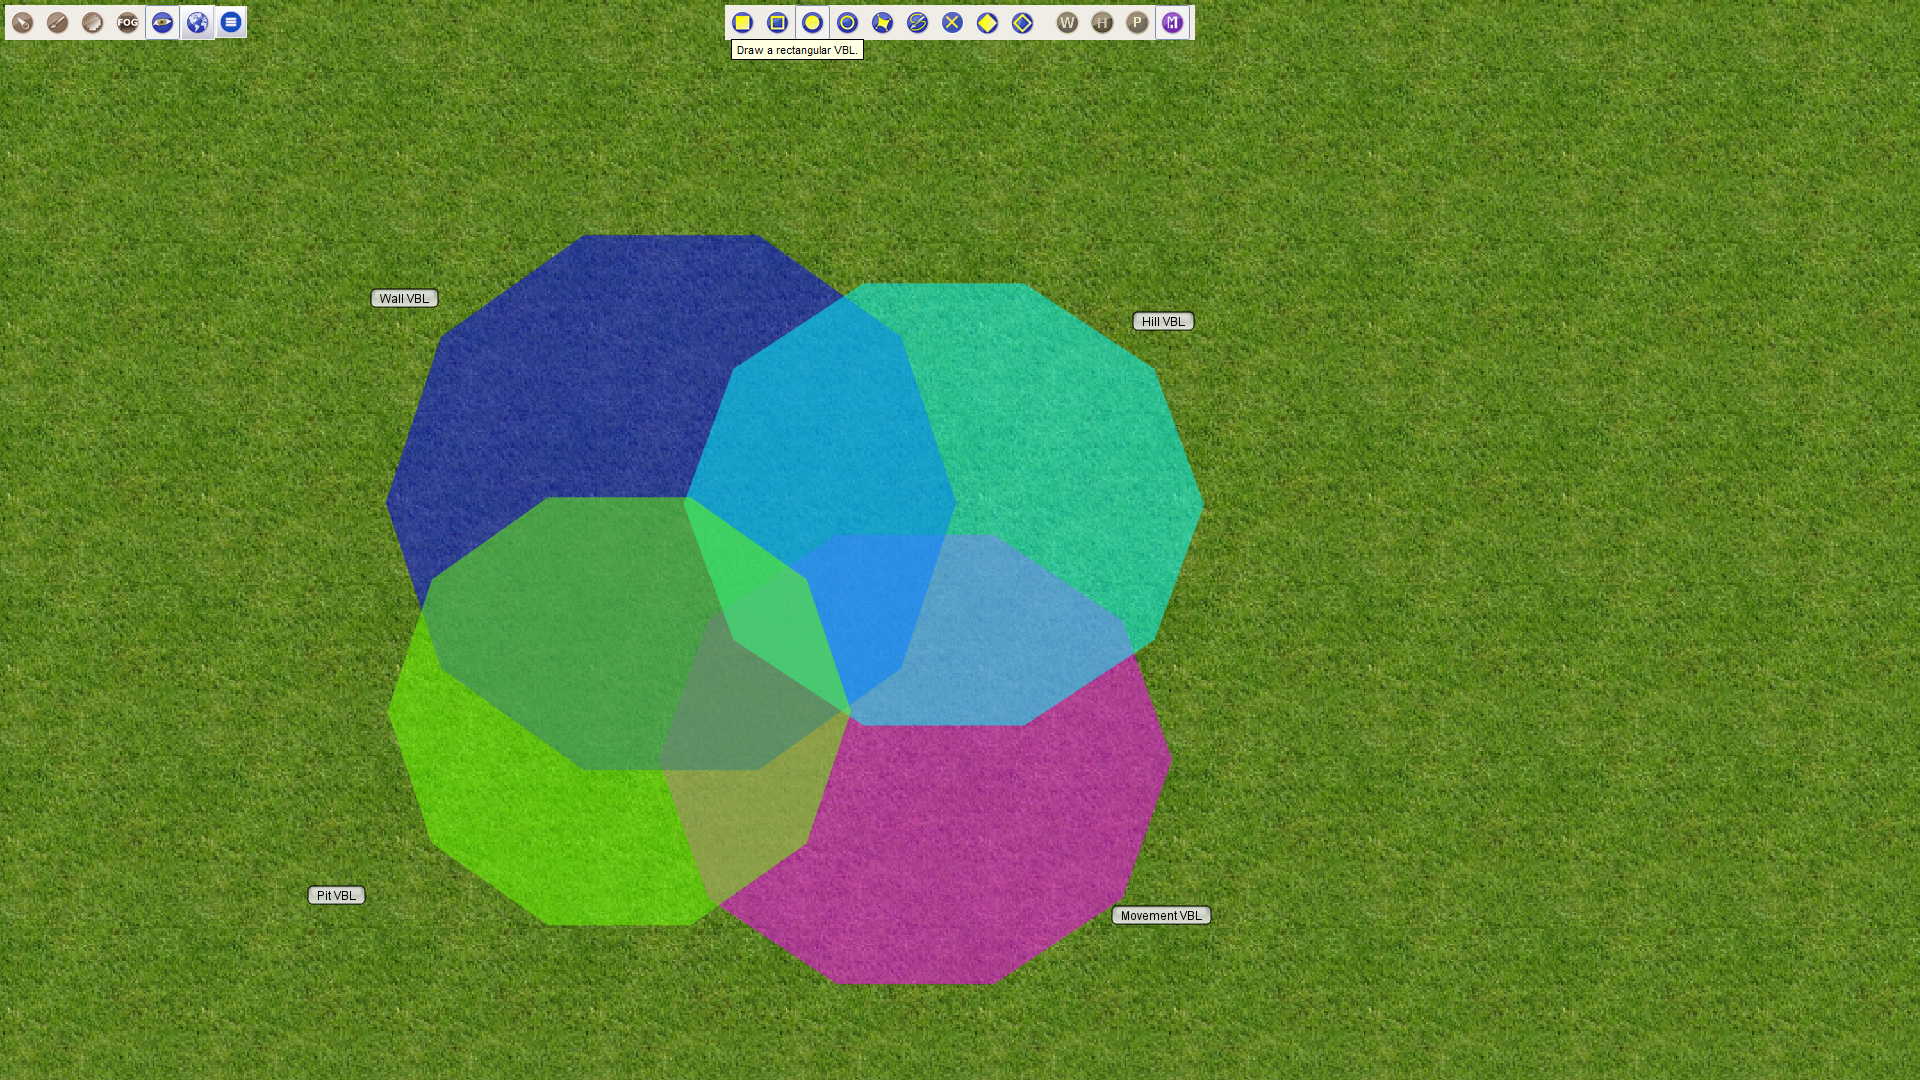
Color combinations of VBL and MBL.

Advanced VBL
- Tokens can also have VBL attached to them. This is called Token VBL. See Introduction to Tokens (the VBL section) for more information.
- Token VBL can be leveraged by bringing VBL in from paint programs. See Adding VBL with a Mask for a tutorial on how.
See also: Introduction to Lights and Sights