Creating TokenTool Overlays
INTERMEDIATE
THIS IS AN INTERMEDIATE ARTICLE
This tutorial will teach you about the structure of layered overlays in TokenTool and how to create them. If you are just getting started with TokenTool, you can check out the TokenTool Quickstart instead.
File Type

TokenTool supports common image formats (JPG, BMP, and transparent PNG) and PSD for overlay images. Because of their built-in transparency features PNG files work well for square overlays.
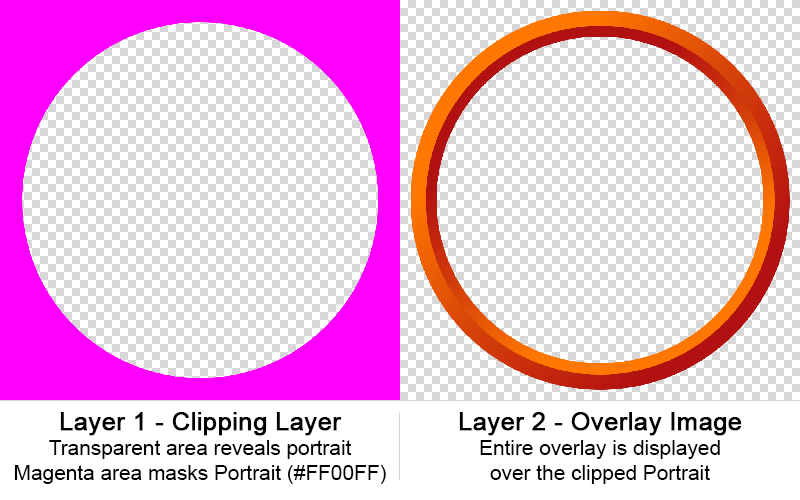
To create non-square overlays which clip the portrait, such as popular 'ring' style overlays, you must create your overlay as a layered PSD file, a Photoshop image file format ending in .psd. PSD is a common format and can be created for free with the GNU Image Manipulation Program (GIMP), Photoshop itself, and many other graphics programs.
Creating a layered PSD

This procedure uses GIMP to create a simple PSD with 2 layers that can be used as an overlay in TokenTool. You must install and open GIMP to follow it exactly. The procedure will be similar in Photoshop or another program as long as the software can save/export to PSD.
Step One: Create the Overlay
- Create a new file, 512x512 is a generous size.
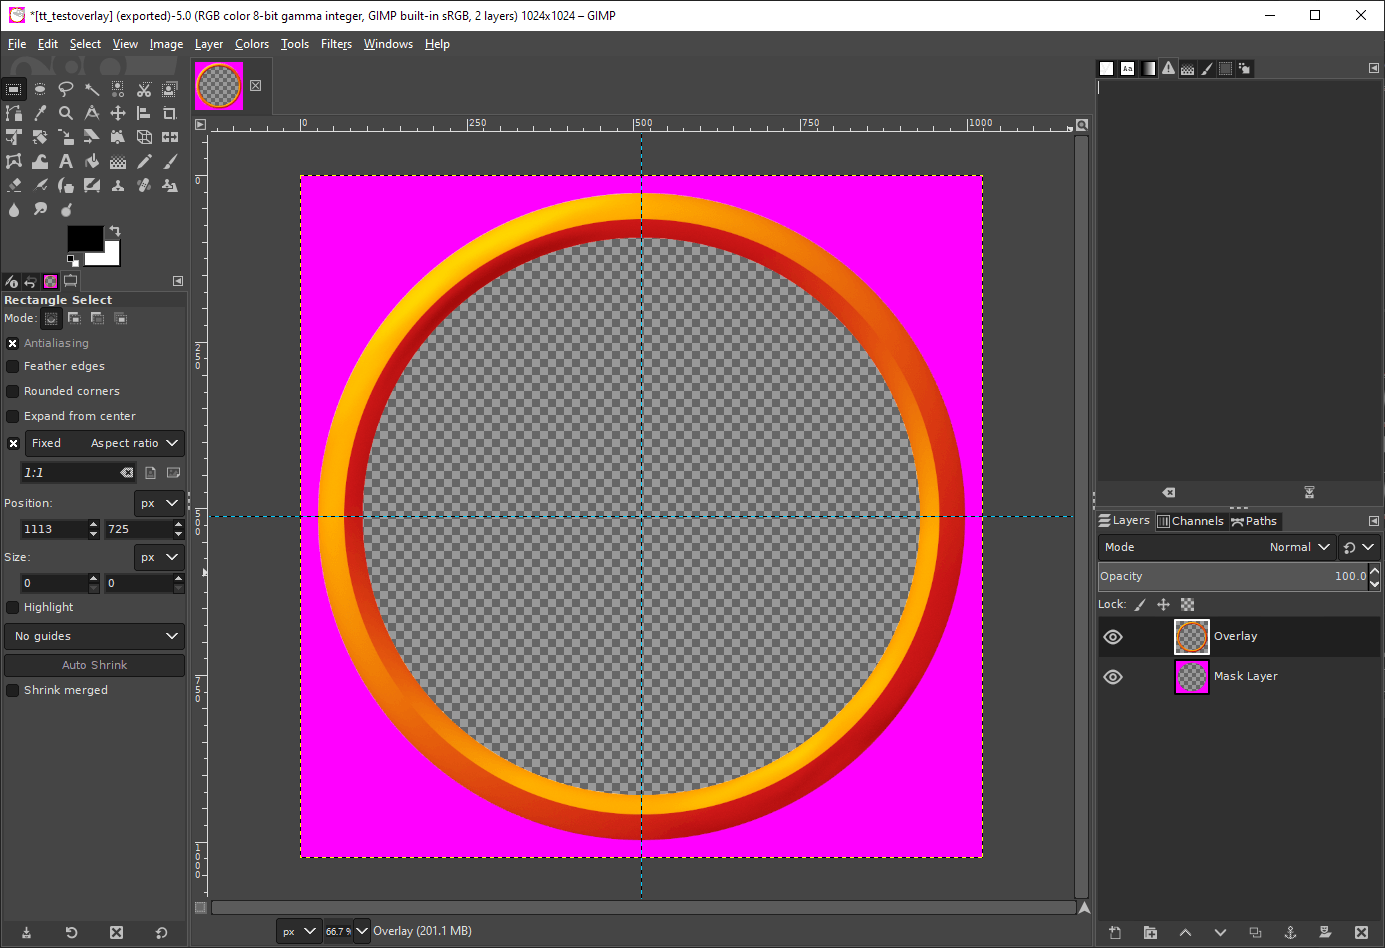
- Add two new transparent layers.
- Make sure all of your layers are set to match the image size. Layer -> Layer to Image Size.
- Delete any opaque default layer.
- On the top layer, place or create your overlay image.
- On the bottom layer, select the area you want to mask/clip the portrait and fill with pure magenta ( #ff00ff)
- Note that the magenta layer sits under the overlay, so the mask boundary can be comfortably beneath the overlay.
- Save your file as a PSD. In GIMP, select
File > Export As..., expand 'Select File Type (By Extension), and select 'Photoshop Image' in the Export Image dialog box.
Step Two: Import the Overlay into TokenTool
- In TokenTool, select
File > Manage Overlays - Select or create a folder in the Directory column where you want your overlay to reside
- Click the 'Plus' icon over the Overlays column to open a file browser
- Select your PSD file and click 'OK'.
- Your overlay should now appear in the Overlays column. Click on it to view the image and mask in the Details column.
You're done! Making layered overlays takes a little bit of knowledge, but you can create neat effects. Note that the Overlay layer can support partial transparency, which is how the default 'Gear' icons appear glassy over the token portrait.
Simpler Overlays
Some people use simple JPG or BMP files as overlays, or PNGs with or without transparencies as a base under a top-down token. If doing so, skip to 'Step Two' above, add your overlay, and select 'Send to Back' in the overlay options accordion panel to place your top-down token portrait above the overlay. You could also achieve this with a blank overlay and a background image, but the way TokenTool works makes a base overlay easy to position the token on centrally.