Auto Resize: Difference between revisions
| Line 29: | Line 29: | ||
===Activate the Auto Resize Feature=== | ===Activate the Auto Resize Feature=== | ||
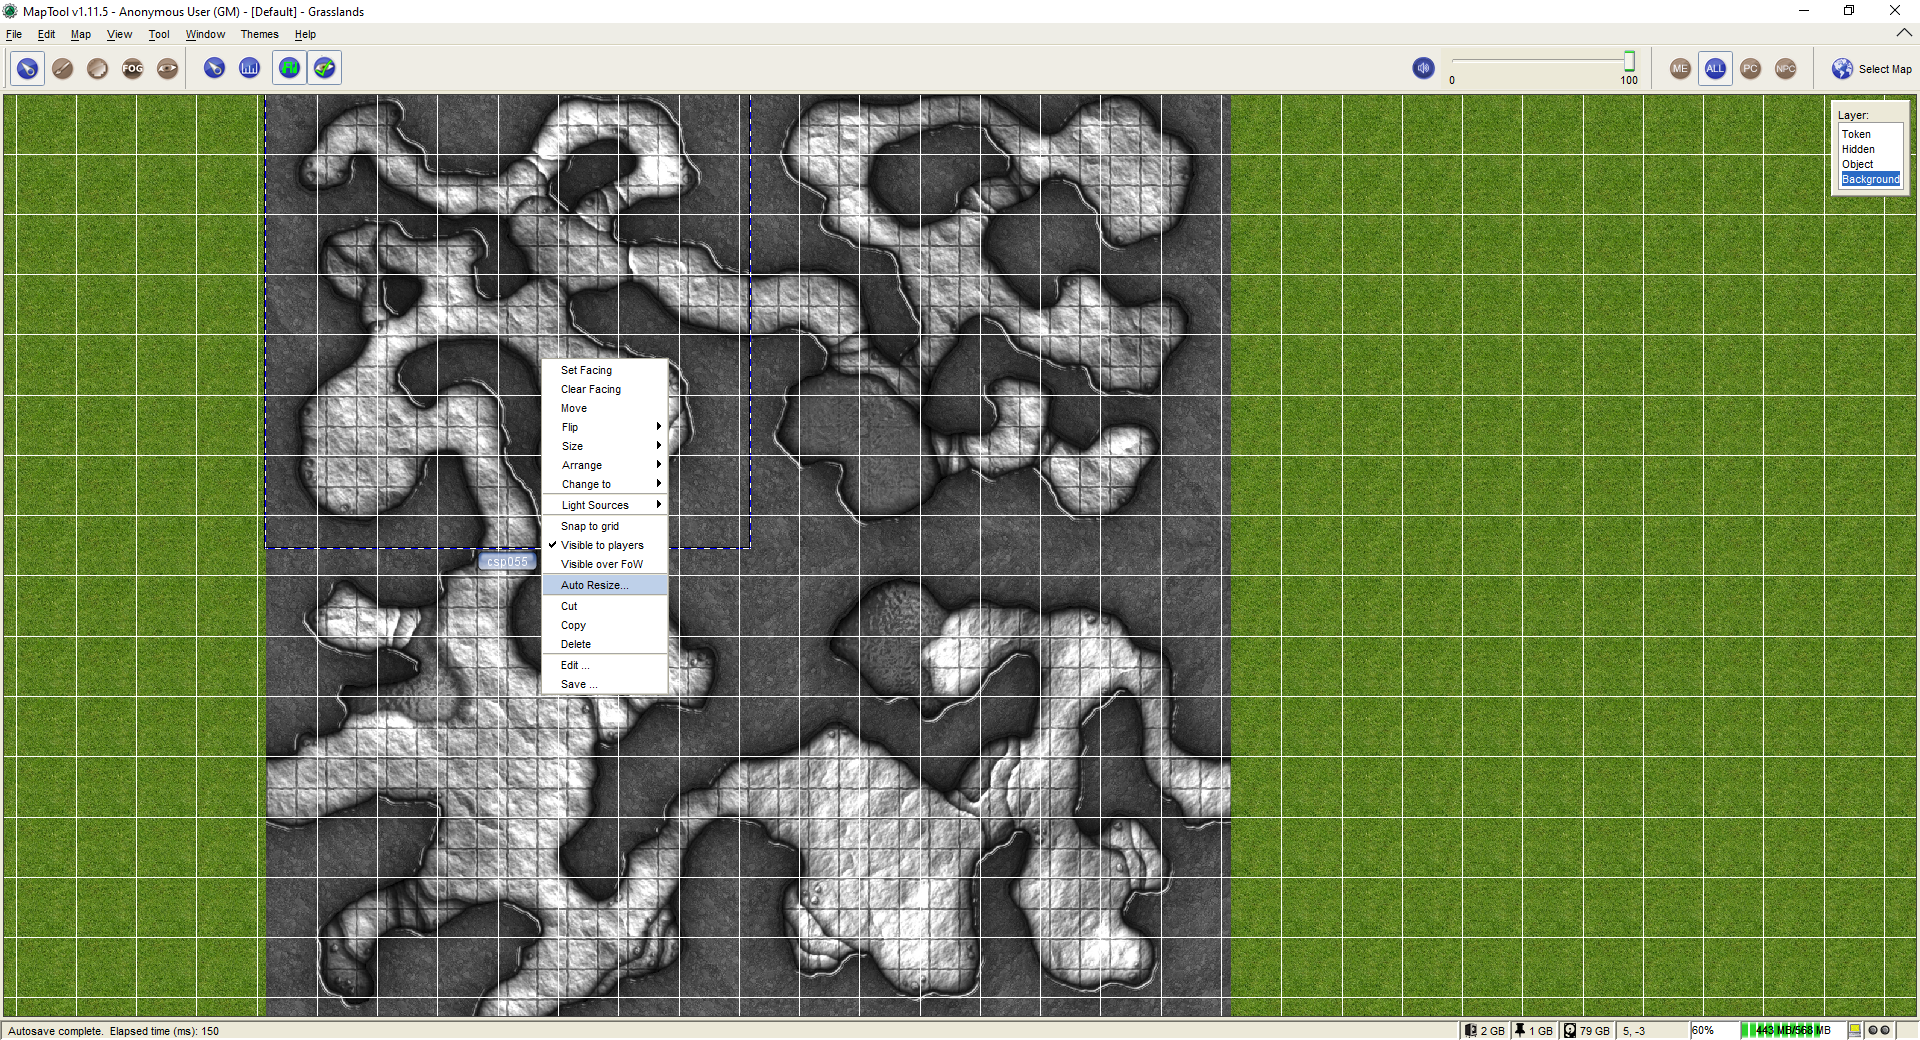
[[Image: | [[Image:AutoResize02.png|thumb|Context menu for images on the '''Background''' layer.]] | ||
* Right click your new stamp and select {{ui location|Auto Resize...|Auto Resize}}. The cursor will change to a cross hair which lets you create a bounding selection box over the stamp. | * Right click your new stamp and select {{ui location|Auto Resize...|Auto Resize}}. The cursor will change to a cross hair which lets you create a bounding selection box over the stamp. | ||
Revision as of 22:10, 17 April 2023
BEGINNER
THIS IS A BEGINNER ARTICLE
Auto Resize is a feature to quickly resize (ie., rescale) map images to fit the current grid.
The process outlined here does not depend on the resolution of the image, nor the number of pixels per cell of the MapTool grid, nor the pixel size of the grid of the image itself. However, it only works (well) for square grids.
Overview of the Process
There are basically four steps:
- Drag your base image onto the Background layer.
- Activate the Auto Resize function.
- Select a rectangular area of the map that corresponds to a rectangular area of the grid on the image.
- Provide the number of cells (horizontal and vertical) contained within the selected area.
Specifics of Each Step
Follow these steps to resize map images to fit the existing grid.
Start by turning off the existing grid lines (they'll just get in the way of your view in the later steps). When you're done, turn the grid back on to check your results.
Load the Initial Map Image

- Drag your map image onto the Background layer (recommended).
Images dragged to the Background or Object layer use their upper left corner as the origin point, while images dragged to the Hidden or Token layer use their center point as the origin point.
Also, images on the Background and Object layer can be easily resized by using the resizing handle that appears in the bottom right corner of the image when selected. Click and drag that handle to resize (hold down Shift to constrain the aspect ratio while dragging).
Turn off MapTool's built in grid so it doesn't obscure lines on the image (Meta-G does that, or use View -> Show Grid).
Activate the Auto Resize Feature

- Right click your new stamp and select
Auto Resize.... The cursor will change to a cross hair which lets you create a bounding selection box over the stamp.
Select a Region of the Image

- Use MapTool's normal methods for panning and zooming the map (right-click-drag, and scrolling your mouse wheel) to position your map so a block of cells can be selected which are easy to count. Often the best cells are ones without walls touching them, since the walls on many map images obscure the actual grid lines.
- Place the crosshairs as close to the center of a grid intersection at one corner of your chosen range as possible. Note that low-resolution maps typically have antialiased grid lines, which makes it difficult to define exactly where a "grid intersection" may be; just use your best guess.
- Note: You are selecting grid cells on the map image, not the MapTool grid (which you turned off in the first step)!
- Use left-click-drag with your mouse to select a block of cells. Your goal is to draw a rectangle whose corners are as close as possible to the center of grid line intersections. (Currently, this rectangle cannot be edited once the mouse is released, so if you don't like the area you selected, just cancel the dialog window that pops up and restart the Auto Resize operation.) As soon as you release the left mouse button, the selection is complete and the dialog will appear (described next).
Enter the Number of Horizontal and Vertical Grid Cells

- Count the number of cells that your selected rectangle covers in the horizontal direction and enter that as the Number of Horizontal Cells Selected.
- Do the same for the number of vertical cells for the field, Number of Vertical Cells Selected.
If the number of cells you selected divide evenly into the Width and Height pixel counts shown on the right, then you've got a perfect match between the grid you drew and the number of cells you counted. This is great!
If you're off by a little bit (perhaps the Width or Height are a few pixels too high or too low), then you may need to do some manually tweaking of the image when the auto resizing process is complete (described below).
Once you hit Ok, MapTool resizes the stamp so that one "map image cell" will equal one "MapTool Grid Cell" and also align the image so the "Map Cells" should match the Grid. This is done by adjusting the "Anchor points" so the map will/can still be set "snap-to-grid".
You are allowed to "tweak" the selection in case your mouse hands are not steady and can not exactly select an area perfectly, or the map is bad or pixelated. A lot of times you may find a map has exact dimensions, eg 2000x1800, so if your select is showing 298 x 302, most likely the grid would be in even multiples and you should change it to 300x300 for better results. Unfortunately, this requires a little trial and error. Once you've used this process a few times, you'll find it to be fairly quick and easy.
(Optional) Make Any Necessary Micro-adjustments
Upper left corner first

It's best to do these steps (if they're necessary) with the MapTool grid turned on. You can do that from the View menu.
- If the image grid doesn't line up perfectly, uncheck snap-to-grid on your image and try
Map -> Adjust Grid.... From here tweak the offsets (not the grid size) to get the MapTool grid to line up with the stamp's grid. You want to focus on getting the image grid in the upper left corner of the image as close as you can to the MapTool grid.
- Another option is to leave the MapTool grid offsets alone and slightly adjust the image position instead. To do this, select the image and hold down Shift while adjusting the map image using the arrow keys on the keyboard. For every key press, you should see the image move by one pixel in the corresponding direction. (If you don't hold down Shift, the image will jump by its full width or height in pixels! A large jump indeed!)
Bottom right corner last

- When the upper left-most grid cell is aligned as close as you can get it, pan the map so you can see the resizing handle in the bottom right of the image. (I usually zoom out, then hover the mouse pointer over the bottom right corner while using the mouse wheel to zoom back in. I find that to be faster than panning.)
- Now left-click-drag the resizing handle while holding down the Shift key (to constrain the aspect ratio of the image) until you get the bottom right-most grid cell on the image to align with the MapTool grid. If the original image doesn't have a square grid (ie, the horizontal and vertical pixel distances are not the same), then don't use the Shift key so that you can resize on each axis independently.
Conclusion
You can use this resize process as many times as you want. Sometimes it may be easier to resize it to blow it up and get it close, turn the MapTool Grid on/off, check things, resize again to fine tune it.
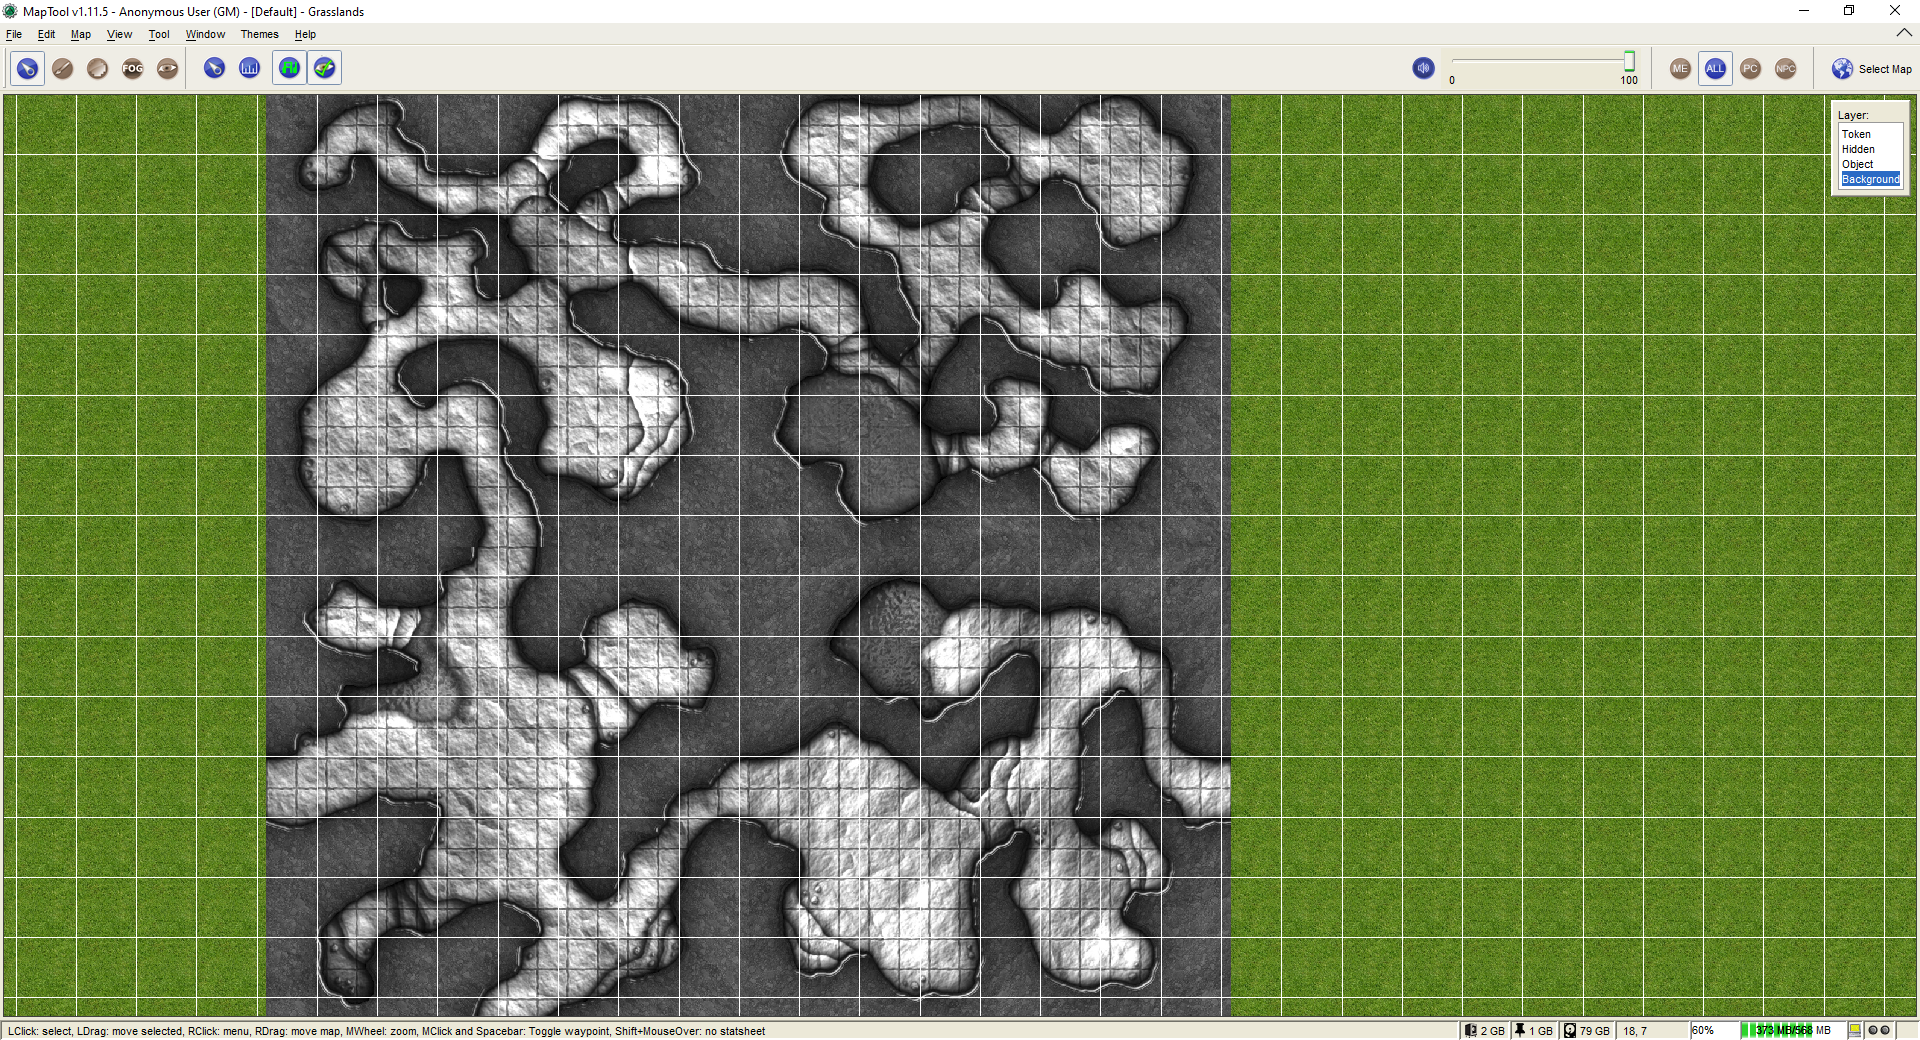
Here are two screen shots of the above process, one with the MapTool grid turned off (so you can see the image clearly) and another with the grid turned on (so you can see how well it aligns).
Caveats
- Not all maps will be perfect. Some maps get skewed or have large grids lines so finding good start/stop points can be difficult. In addition, sometimes the artists are not purists (!) and will apply artistic license and fudge some grid cells. For those situations, you're better off loading the image into a paint program and resizing it to get the grid as square as you can by stretching the horizontal or vertical axis as necessary.
- For the most part, this approach will get you decent results and you can still resize it manually to fine tune. (It takes me about 3 minutes to go through this process, from start to finish.)
- Note that some maps may have multiple sections where each section has its own grid origin. For example, a castle may have a courtyard with a grid whose origin is at (x0, y0) while an area connected to the courtyard may have a grid with another origin. Since MapTool applies only a single grid to a map, you cannot have different grid settings for different areas of the same map. In this case, you should use an external paint program to split the original map image into separate pieces, then each piece can be dragged into MapTool and adjusted independently of the others.

