Introduction to Mapping/fr: Difference between revisions
| Line 59: | Line 59: | ||
<br style="clear:both;"/> | <br style="clear:both;"/> | ||
== | ==Créer une Carte== | ||
[[Image:Map-newmap.jpg|thumb| | [[Image:Map-newmap.jpg|thumb|Entrée de menu '''Nouvelle carte''']] | ||
[[Image:Map-new-dialog.jpg|thumb| | [[Image:Map-new-dialog.jpg|thumb|Fenêtre '''Map Properties''']] | ||
1. | 1. Menu '''Carte -> Nouvelle carte...'''. Cela affichera la fenêtre de dialogue ''Map Properties''. | ||
2. | 2. Sur le côté gauche de la fenêtre ''Map Properties'', vous trouverez plusieurs options et zones de texte. | ||
* '''Name''': | * '''Name''': ceci est le titre de la carte. Notez bien que si vous sélectionnez une image de carte ("map image"), le titre sera réinitialisé au nom du fichier image mais vous pourrez le remodifier par la suite. | ||
* '''Cell Type''': | * '''Cell Type''': grille hexagonale ou carrée ou sans grille du tout. | ||
* '''Distance Per Cell''': | * '''Distance Per Cell''': combien d'unités de mesure arbitraires couvre chaque case/hexagone de la grille (''par exemple'', pour Donjons & Dragons 4, mettez "1", étant donné que toute distance est comptabilisée en "cases". Pour Donjons & Dragons 3, mettez "5" étant donné que tout y est mesuré en "pieds") | ||
* '''Pixels per cell''': | * '''Pixels per cell''': combien de pixels chaque case/hexagone couvrira – la valeur par défaut est 50. Ce paramètre est important pour mettre la grille à l'échelle de l'image de carte éventuellement utilisée. | ||
* '''Vision Distance''': MapTool | * '''Vision Distance''': MapTool gère la vision, le Brouillard de Guerre, et d'autres fonctions, et ceci indique à quelle distance, par défaut, un personnage peut voir dans la carte. | ||
<br style="clear:both;"/> | <br style="clear:both;"/> | ||
[[Image:Background-dialog.jpg|thumb| | [[Image:Background-dialog.jpg|thumb|Fenêtre '''Choose Background''']] | ||
3. Click the '''Background''' button. You’ll get a pop-up dialog offering several options. The background texture and/or color are infinitely tiled in all directions. | 3. Click the '''Background''' button. You’ll get a pop-up dialog offering several options. The background texture and/or color are infinitely tiled in all directions. | ||
Revision as of 20:52, 17 April 2009
BEGINNER
THIS IS A BEGINNER ARTICLE
Introduction
Ne mettons pas la charrue avant les boeufs : Qu'est-ce que MapTool?
Bien que vous ayez probablement une idée de ce qu'est MapTool et qu'il fait, nous voulons juste prendre un moment pour réaffirmer l'objectif premier de MapTool :
MapTool est un programme qui vous aide à partager une "table de jeu virtuelle" avec vos amis, afin que vous puissiez jouer ensemble.
C'est ce que MapTool fait, et ses fonctionnalités sont pensées pour fournir un ensemble d'options, de la plus simple à la plus complexe, pour atteindre cet objectif.
Parmi tout le blabla sur les macros, propriétés, tables, programmation qui va suivre dans ce guide et d'autres, ne perdez pas de vue la raison pour laquelle vous essayez MapTool : c'est un moyen de jouer avec vos amis.
A propos de ce guide
Le but de ce guide n'est pas de plonger dans les arcanes des système de programmation de macros de MapTool, d'éclairage, de propriétés ou n'importe quel autre "truc" compliqué. Au lieu de cela, ce guide devrait vous permettre de démarrer dans l'utilisation de MapTool, en l'utilisant comme un outil de création de carte pour les Jeux de Rôles. D'autres guides abordent des sujets comme héberge une partie en ligne, utiliser les pions, mettre en place la gestion de la vision et de la luminosité etécrire des macros.
Les instructions qui suivent devraient vous permettre de démarrer et d'utiliser MapTool comme un outil de création et d'utilisation de cartes tactiques. Cependant, cela nécessite quelques prérequis :
- Vous savez comment créer ou récupérer des images de carte. Il y a des teraoctets d'images de carte disponibles sur le web. Fouillez par exemple la gallerie de RPTools ouRPGMapShare.
- Vous pouvez démarrer MapTool sur votre ordinateur. MapTool nécessite Java 1.5 (minimum).
Donc, nous y voilà. Pour commencer :
- Récupérez MapTool à partir de http://rptools.net. La dernière version de MapTool peut toujours être trouvée au début de cette liste. NOTE: Vous pouvez aussi démarrer via le Java WebStart sans avoir à télécharger et dézipper de fichier.
- Si vous téléchargez le fichier zip de MapTool, décompressez le quelque part sur votre ordinateur et assurez vous qu'il démarrer. Les fichier .bat fournis renseignent quelques paramètres automatiquement, comme la mémoire allouée. MapTool démarrera si vous double-cliquez sur le fichier .jar, mais en affichant quelques avertissements. Si vous utilisez Windows, il est possible d'utiliser le "Windows Launcher" aussi, qui permet de modifier aisément le paramétrage.
Maintenant, cartographions utile.
Ajouter des Images à votre bibliothèque de Ressources MapTool
La Bibliothèque de Ressources de Maptool est en fait une collection de "pointeurs" ou "liens" vers des répertoires de votre ordinateur, contenant des images que vous voulez utiliser avec MapTool. MapTool est livré avec un ensemble d'images, mais vous pouvez ajouter n'importe quelle image - vous contrôlez quelles images sont disponibles dans MapTool.
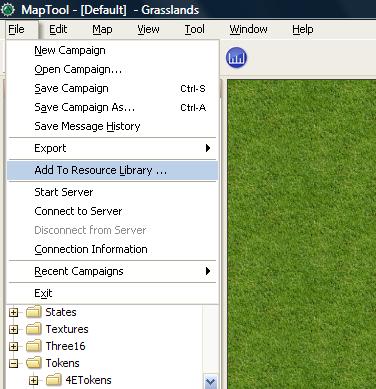
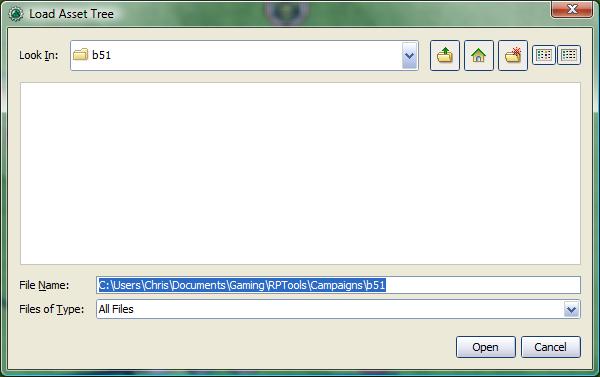
1. Obtenez quelques images (des cartes par exemple) : téléchargées du web ou créées par vos soins. Placez les dans un répertoire que vous retrouverez - ce répertoire est important pour l'étape 3.
2. Lancez MapTool.
3. Sélectionnez le menu Fichier -> Ajouter à la bibliothèque de Ressources (voir les images à gauche). Cela ouvrira la fenêtre de dialogue appelée Charger une bibliothèque de Ressources (cliquez sur la miniature pour voir une image grande taille).
4. Dans la fenêtre de dialogue, placez-vous dans le répertoire où vous avez placé les images que vous voulez ajouter, et cliquez sur Ouvrir. MapTool parcourera les images contenues dans le répertoire indiqué et ajoutera un nouveau dossier dans l'arborescence "Resource Library" dans MapTool.
NB : le nom du dossier dans la "Resource Library" de MapTool sera le même que le nom du répertoire choisi à l'étape 3.
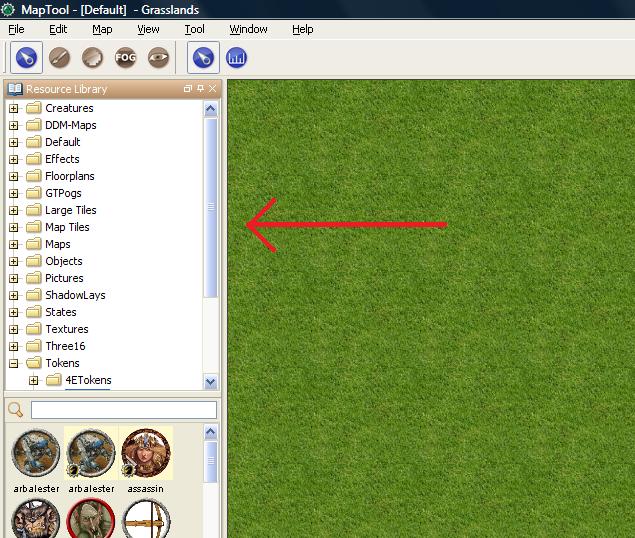
5. Ensuite, si vous sélectionnez un des dossiers dans la "Ressouce Library" (cf. l'image ci-dessous), vous verrez des miniatures des images de ce dossier. NB : si votre répertoire a des sous-répertoires, cliquez sur le + pour déployer l'arborescence. De plus, vous n'aurez pas besoin d'ajouter de nouveau ce répertoire - MapTool se souviendra de ce que vous avez choisi.
NB : Puisque les dossiers qui apparaissent dans la "Ressource Library" sont en réalité des liens vers des répertoires du disque dur, MapTool ne duplique pas chaque fichier -- la "Ressource Library" est juste un moyen pour MapTool de savoir où se trouvent les images.
Créer une Carte
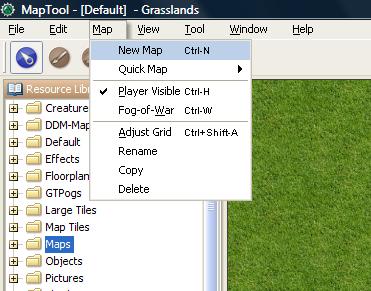
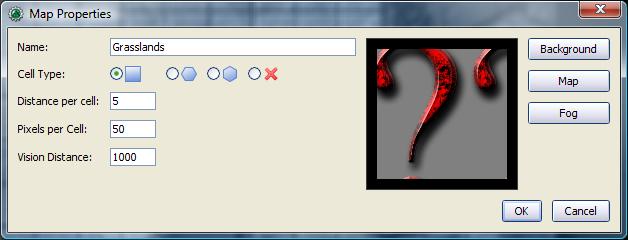
1. Menu Carte -> Nouvelle carte.... Cela affichera la fenêtre de dialogue Map Properties.
2. Sur le côté gauche de la fenêtre Map Properties, vous trouverez plusieurs options et zones de texte.
- Name: ceci est le titre de la carte. Notez bien que si vous sélectionnez une image de carte ("map image"), le titre sera réinitialisé au nom du fichier image mais vous pourrez le remodifier par la suite.
- Cell Type: grille hexagonale ou carrée ou sans grille du tout.
- Distance Per Cell: combien d'unités de mesure arbitraires couvre chaque case/hexagone de la grille (par exemple, pour Donjons & Dragons 4, mettez "1", étant donné que toute distance est comptabilisée en "cases". Pour Donjons & Dragons 3, mettez "5" étant donné que tout y est mesuré en "pieds")
- Pixels per cell: combien de pixels chaque case/hexagone couvrira – la valeur par défaut est 50. Ce paramètre est important pour mettre la grille à l'échelle de l'image de carte éventuellement utilisée.
- Vision Distance: MapTool gère la vision, le Brouillard de Guerre, et d'autres fonctions, et ceci indique à quelle distance, par défaut, un personnage peut voir dans la carte.
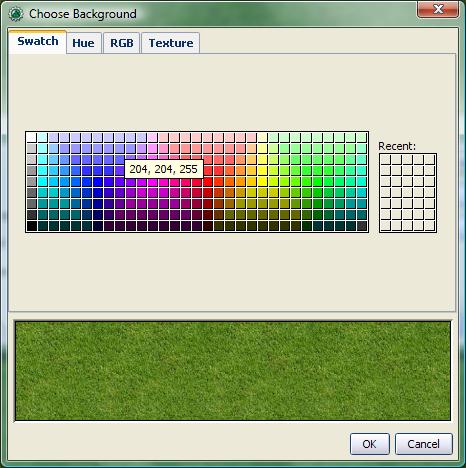
3. Click the Background button. You’ll get a pop-up dialog offering several options. The background texture and/or color are infinitely tiled in all directions.
- Swatch: lets you use a uniform color as the map background.
- Warning: As recently as version 1.3.b53, if you select the top-leftmost swatch (the "white" swatch), MapTool will generate an error. The error will not cause MapTool to crash or anything, but it will not set the background to white. As a workaround, you can set the background to white via the Hue or RGB tabs.
- Hue/RGB: lets you specify colors instead of selecting a color swatch
- Texture (what I use most often): gives you access to your resource library, where you can select a texture to serve as the background.
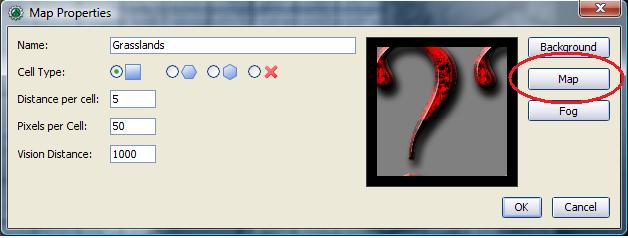
4. If you have a map image in mind (like a downloaded one, or one you created in Photoshop or something like that), click the Map button. You’ll be taken to a dialog that shows your Resource Library. Select the image you want to use. This image will be layered above the background you already selected.
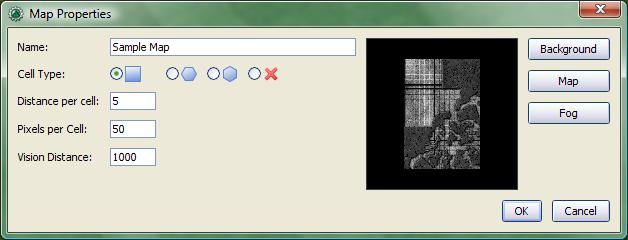
5. When you’re satisfied with the background and map – you’ll be given a preview thumbnail to double check, as shown below - give it a title, and click OK. The map will now be loaded into the main window of MapTool.
Creating Multiple Maps in One Campaign
MapTool lets you create multiple maps, all of which will be in one campaign. The process is very simple: you simply repeat the Creating a Map steps for each new map, selecting a new image, background color/texture, and title for each new map.
Each new map you create will automatically be created within the campaign you are currently working on (creating a new map does not automatically save your campaign, so make sure to save your work when you're finished).
You can also add new maps to a campaign you've already saved - just open the campaign file (by going to File > Open Campaign) and follow the steps to create a new map.
MapTool Main Window
MapTool Layers

Once you have a map loaded, you’ll see a small box in the map window titled Layer. MapTool maps have four layers:
- Background: this is the layer for images, background maps, and anything that isn’t going to move.
- Hidden: for online games, this is a layer only the GM can see.
- Object: this is a layer for token-like objects, things that might move, or that players might be able to move (lamps, tables, etc.).
- Token: this layer is the layer that tokens go on (tokens are small images that represent characters or NPCs). Make sure you have the Token layer selected when you’re adding characters and enemies to the map.
Think of the MapTool Layers as four different sheets of acetate or tracing paper, one on top of the other. The bottom one - the Background - is where you draw the basic parts of the map: walls, floors, trees, etc. On the next sheet of tracing paper, the one called Objects you draw the things that your characters might use, mess with, or break: doors, chests, tables, chairs, and so forth. On the next one up - the Hidden layer - you put things only the GM can see (which might be objects or hidden characters!). Finally, on the very top layer - the Token layer, you put your miniatures - the monsters, characters, and NPCs of the game world.
Tokens can be put on any of the 4 layers in MapTool. To do so, just right-click on the token image, and select Change To >. In the menu, select the layer you want to change the token to, and it will be moved.
Selecting Maps
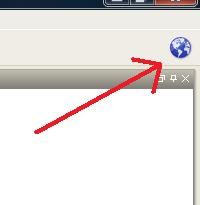
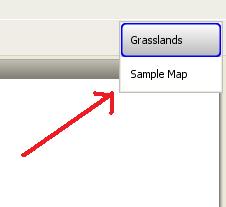
If you create only one map in your campaign, it will be loaded by default and will be the only map you can see.
If you create multiple maps or have a campaign with multiple maps, you can choose between them by clicking the blue globe icon in the upper right hand side of the MapTool window – this will present a list of possible maps. Note that if you have only one map, clicking on the blue globe will show that map's name.
Zooming and Moving
To zoom the map, you can use the mouse scroll wheel (if you have one), or you can use the equals sign to zoom in, and the hyphen to zoom out.
Hitting the plus sign will zoom to 1:1.
To move the map, right click on it and move the mouse. This will pan the map in any direction.
Token Basics
MapTool Tokens (or just "Tokens") are small images that act as visual representations of many things in a MapTool map. The most common use for tokens is to represent player and non-player characters - in other words, tokens take the place of miniatures on the virtual map.
Tokens, like everything else, start as image files that are stored in your Resource Library. MapTool comes with some default tokens (and they have a great, separate program called TokenTool that lets you make tokens), or you can supply your own from wherever you find them.
This section of the Introduction to Mapping guide deals with only a few of the most basic, common things you might want to do with MapTool Tokens. There are many features, tricks, and cool functions available when working with tokens - so many that they deserve a guide all to themselves.
Placing Tokens on the Map
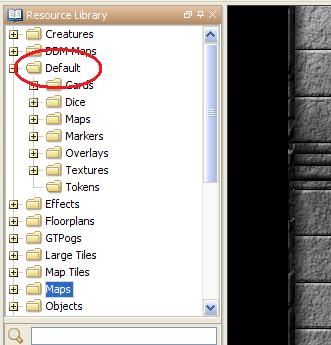
1. To see the default tokens mentioned above, go to the Default folder in your Resource Library, and click the + to expand it.
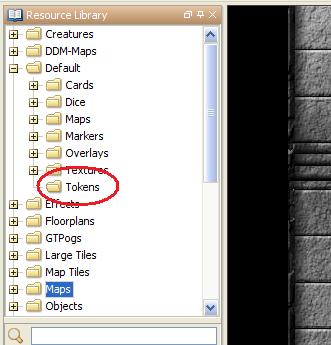
2. Select the Tokens folder.
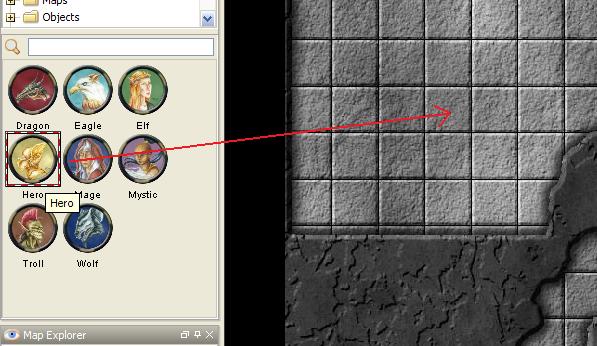
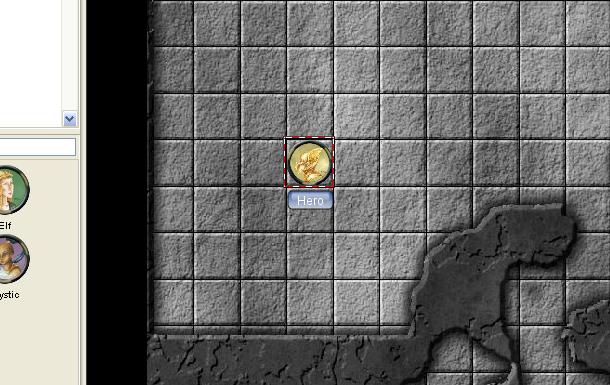
3. In the window below (where the thumbnails appear), use the mouse to drag a token onto the map. The cursor will change to a hand, and you just need to hold the token over the map somewhere and release the button.
When you release the mouse button, the token will appear on the map, as shown in the thumbnail.
Moving Tokens
Once a token is on the map, it can be dragged around using the mouse, or moved by selecting the token (clicking on it) and using the arrow keys to move the token, and pressing the D key to complete the move.
If you want to create a complex path, you can hit the space bar to make a waypoint in your path.
Changing a Token's Name, GM Name, and Label
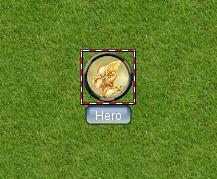
Tokens have three possible "names" you can assign to them. When a token is first dragged onto the map, it is given a default name (typically, the same as the token's filename on your computer, with the extension trimmed off). For example, the token shown in the image below was dragged from MapTool's default token set, and its default name is "Hero."
The three possible names a token can have are:
- Token Name: The name of the token that will appear to all users. This is not optional.
- NOTE: Make sure each token has a unique name! Otherwise, MapTool macros may behave unpredictably.
- GM Name: This name appears only to the person(s) currently connected to MapTool in the role of "GM."
- Label: This text appears below the Token Name, and is visible to all connected individuals.
To change a token's name, GM name, and/or label:
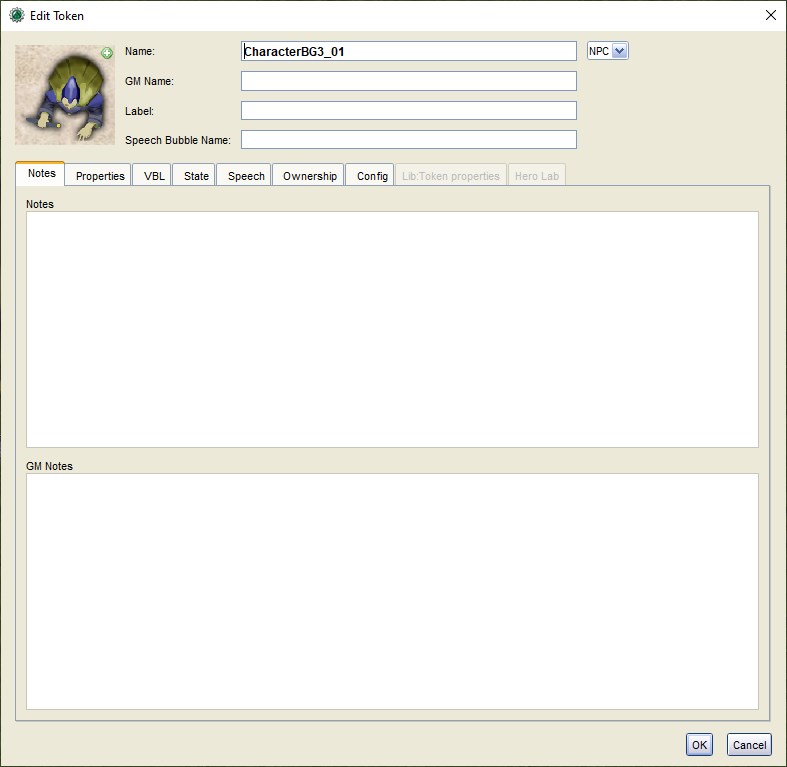
1. Double-click on the token image on the map. This will open the Edit Token dialog, as shown below.

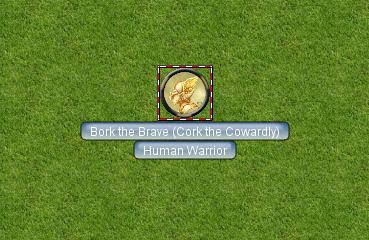
2. In the Name field, enter the name you'd like. For this example, I've entered "Bork the Brave"
3. In the GM Name field, enter a name. For this example, I've entered "Cork the Cowardly"
4. In the Label field, enter a Label. For this example, I've entered "Human Warrior".
5. Click OK to save your changes.
Once you've clicked okay, you'll see that the token has changed:
You can do this name changing process with any token you drop on the map.
Changing a Token's Image
Sometimes, when you create a new token, you will want to change the image on the token's face. Say, for instance, you find a cool new picture that you just have to use for your evil overlord, but you already have a token made up for him - you don't want to delete the whole token just to change the image, right? That's overkill. Instead, just change the token image using the following steps:

1. Make sure you have a new token image in PNG or JPG format, already available in your MapTool Resource Library. If you look at Getting Images Into your MapTool Resource Library section, above, it talks about how to get map images into your Resource Library: well, token images (in fact, any image) can be added to your resource library in exactly the same way.
2. Double-click on the token to open the Edit Token dialog.

3. In the upper-left of that dialog, click the small green plus sign.
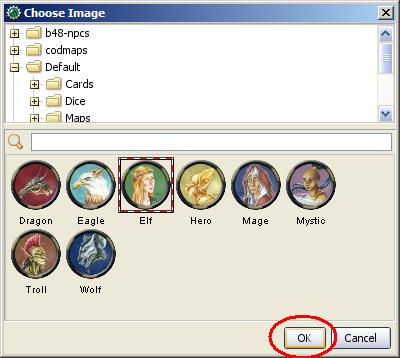
4. In the Choose Image dialog, select the Resource Library folder that has the new token image in it (a red-and-white border will indicate the image you've selected), and click OK.

5. Once you hit OK, you are taken back to the Edit Token dialog, and you will see that the token image has been changed to the one you selected.
Changing Token Size
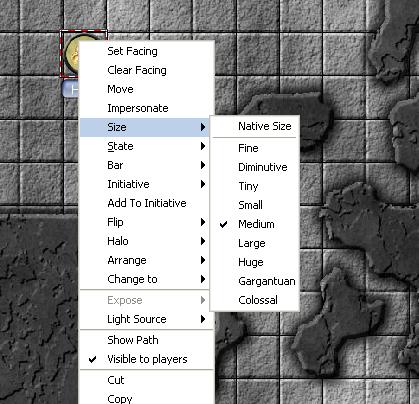
Tokens will default to the size of one grid square (note that by default, MapTool’s grid is 50x50 pixels). If you right-click on a token, the menu has a lot of options – one of which is Size. You can then set it using the size values there, so you can make large or huge or gargantuan creatures, and so forth. The image below illustrates the right-click menu for a token.
NOTE: these size values (large, huge, gargantuan, etc.) only apply to maps that have a grid (remember, when you create a map, you have the option to make a map with no grid). If you use a gridless map, the size values are more fine-grained.
Saving Your Work
MapTool's default "save" format is called a Campaign File. The Campaign File (which has the extension .cmpgn) contains the maps and tokens that you've set up. If you're interested in this sort of thing, the campaign file is actually a zipped XML file.
To save your work so far, choose File -> Save Campaign, give your campaign a name, and that’s all there is to it.
When you save a campaign, MapTool saves the locations of the tokens on all of the maps, so you can pick up right where you left off!
Exporting Map Images
MapTool can export your map images to an image file (PNG format). To export an image to a location of your choice:
1. Go to File->Export and select Screenshot As.
2. In the dialog that comes up, select a "View" (either GM view, where you can see everything, or Player View, where the only things visible are what players can see...I told you MapTool had some cool vision capabilities!)
3. Select the destination for your file using the Browse button (or, alternatively, send it to an FTP server)
4. Click Export.
Next Steps
Now that you can create a basic map and put some tokens on it, the next step is connecting up with some friends over the Internet (or face to face) and using it for a game session! This topic is covered in the Introduction to Game Hosting.